Recipes

Burn your beans, burn your zucchini

‘Control burn’ your veggies.  It brings out delicious flavours.

Char Grilled barbequed Zucchini:

Ing.

Zucchini

Olive Oil

Murray River Pink salt

Cracked or freshly ground pepper

Slice the zucchini, add olive oil, salt and pepper and add to hot grill barbeque, one minute each side.  Done.

So simple!  So good!

Blistered beans and ginger:

Ing.

Any quantity of beans (the lager quantity the better because they will all be consumed)

10 very fine slices of fresh ginger or grate fresh ginger instead

3 sprigs of spring onion

Sesame oil

Mirin

Sake (if you have some, otherwise don’t worry about it)

Soy Sauce

Murray River Pink salt

Cracked or freshly ground pepper


Trim the ends from the beans, place into a hot skillet with sesame oil.  Add sliced spring onion, sliced ginger, a splash of mirin, a splash of soy, a splash of sake, a sprinkle of Murray River pink salt, freshly ground pepper.   Toss frequently.

 Keep on high heat until ‘control burnt’.  Blistered beans are what you are looking for.

Now eat!  Delicious!

IMG_2792.jpg

Liquorice Root and Fennel - Lamb Shanks

A slow cooker can be used. The recipe advises the changeover time.

I think I have discovered something unique. The flavour of this dish is something I have never tasted before. It was naturally sweet and had the most amazing unique flavour!

Fennel has a terrific flavour. Added to Crushed Licorice Root and allowed to infuse, the flavour really livens up. I wouldn’t say it has a licorice flavour, but it was a flavour I had never tasted before. It was so good I had to share it!

Ingredients

1 teaspoon of Licorice Roots, infused in 2 cups hot water
2 tablespoons of olive oil
4 fresh lamb shanks
A large bunch of fennel, sliced
1 onion, cut into rings
2 shallots, whole, peeled
1 red capsicum, cleaned and sliced
3 Sprigs of spring onion, chopped
A handful of Continental parsley, chopped
Massel powdered chicken stock
Murray River Pink Salt
Cracked or freshly ground pepper

Prep.

Preheat oven to 200c. Place the Crushed Licorice Roots into 2 cups of hot water. Stir and allow to infuse whilst you continue on below. Set aside.

Method

In a large oven ready pot (with oven lid) gently pan fry the onion rings in olive oil. Flip them after a few minutes. Now add the shanks. We want to externally brown the shanks. Turn them over every five minutes or so. Once browned, you can transfer this dish to your slow cooker.

Once the shanks are browned throw all your vegetables (fennel, capsicum, shallots, spring onions and parsley) into the pot on top of the lamb. Sprinkle Murray River Pink salt, cracked pepper to taste and the Massel chicken stock.

Now pour the infused licorice root water into the pot. Top up the pot with hot water so that the liquid in the pot comes up to two thirds the height of the ingredients. Leave some of the ingredients out of the liquid. Allow the contents of the pot to heat, covered, on the stove for about five minutes.

Place the pot into oven for 1.5 hours. Check it every 30 mins or so to ensure the liquid has not reduced. If it has, top it up with hot water. Don’t let the pot run dry. If it is well covered it should not lose liquid.

Once ready, this can be eaten as is or on a bed of rice.

Enjoy. This one is especially good!

Spicy Australian Brandied poached dried fruit

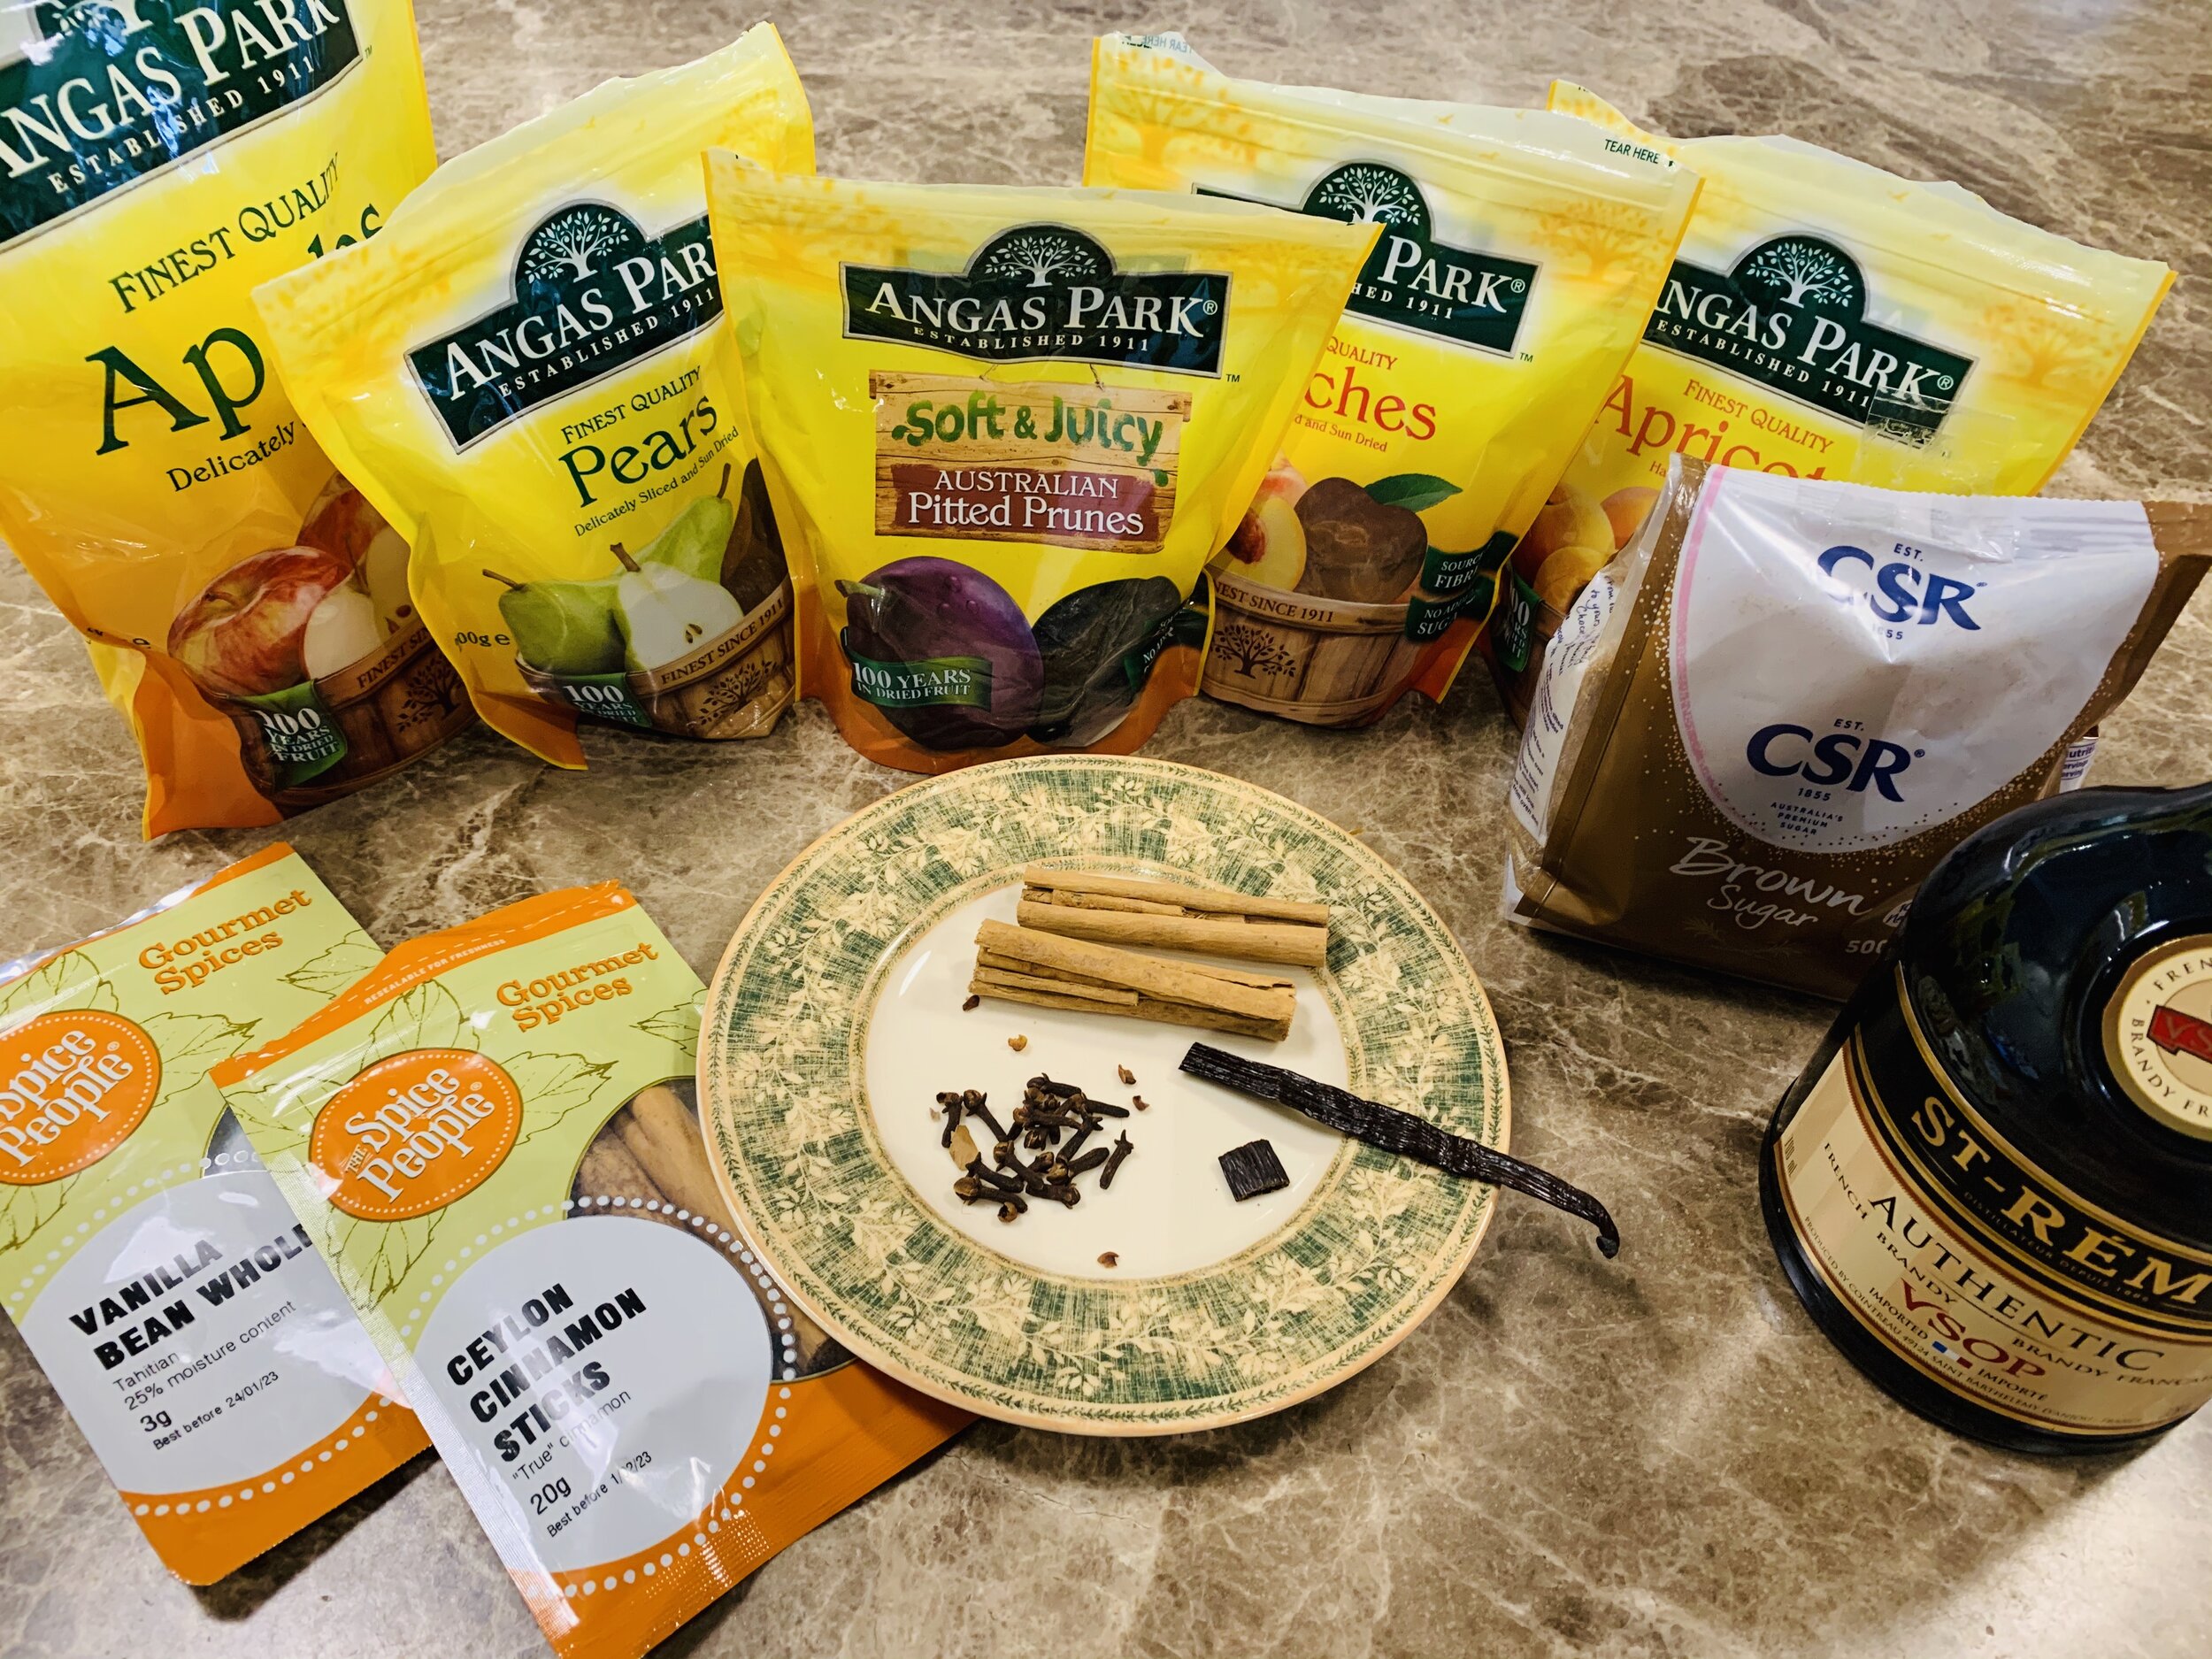
You have all read my posts where I don’t believe we should wait for December to enjoy the delights of Christmas food.  Today I poached Australian dried fruits with brandy and spices.  OMG! This is so good words cannot explain, but facial expressions can!


In your pot, bring to the boil 1 cup of brown sugar with 2 to 2.5 cups of water, two cinnamon sticks, vanilla bean scrapings (and the bean), a teaspoon of mixed spice, about 12 cloves and a good splash of brandy.  I gave mine a really good splash of brandy!  The alcohol evaporates early but the flavour remains. Boil for 2 minutes.


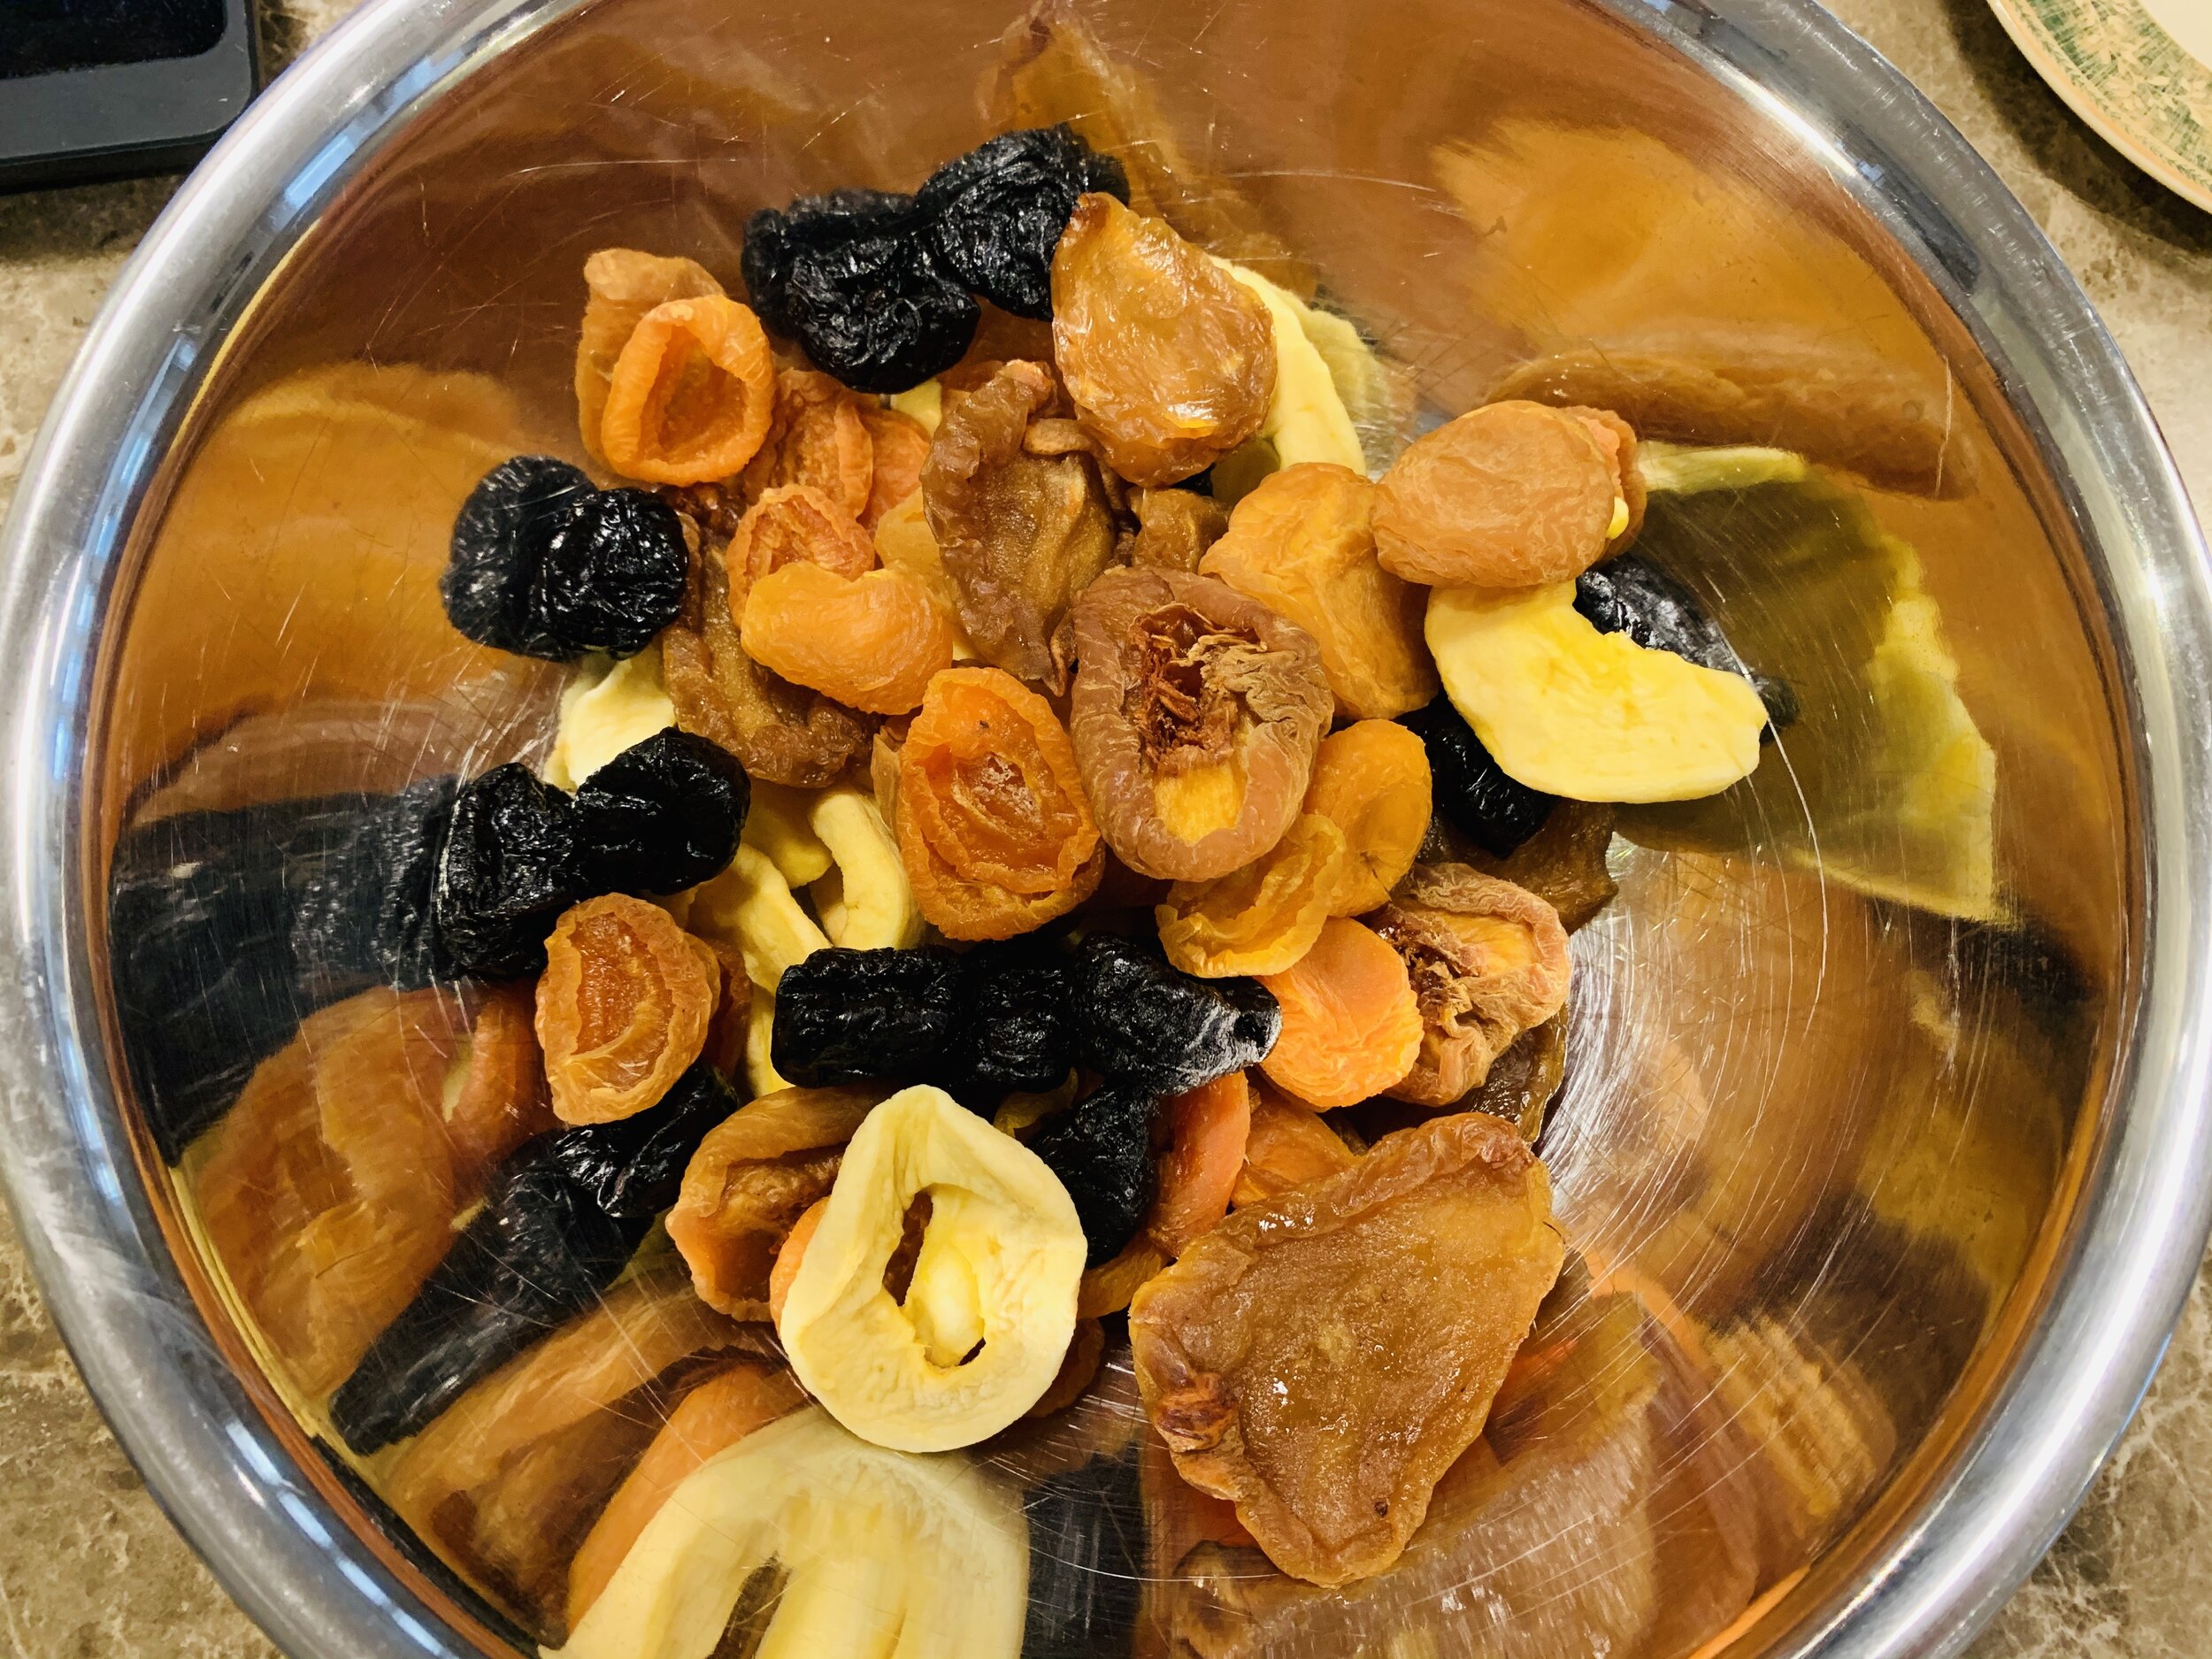
Now turn down the stove to the lowest possible heat setting and add 500g of Australian dried fruit.  I added pears, apples, prunes, peaches and apricots.   Given the fruit is dried, 500g is a lot of fruit.  Let it simmer for 30 mins, slowly turn it over occasionally so all the fruit absorbs the liquid. 


Remove and discard the cinnamon stocks and vanilla bean. Let it cool and slap on a dollop of freshly whipped cream.


Incredible!!


You can place these fruits in their liquid into sealed glass jars for storage in the refrigerator, guaranteeing a week’s supply of excellent lock down food.  


You can eat this as a meal.  Who needs savoury food?


Stay well, enjoy isolation!

A simple winter warming chicken soup

Simple chicken and veg soup (broth)


I know you can all make this, so this will serve as a reminder of how delicious it is and simple to make.  You’ll need:


2 fresh chicken carcasses

2 carrots

1 potato

3 sticks of celery

I onion

3 sprigs of spring onion

3 cloves of garlic

A bunch of fresh Continental parsley

Massel powdered Chicken Stock

Murray River Pink Salt

Cracked or freshly ground pepper


Put the kettle on as we require lots of hot water for this soup. 


Chop all the vegetables into little pieces.  A good knife is essential.  Perhaps I’ll do a review on the knife I use...  A good chef’s knife will make this chopping easy.  Of course the onion, the garlic and the parsley should be finely chopped.  We are not going to fry anything in oil.   


Place all your vegetables into a large pot on medium heat.  Stir them for about five minutes whilst they soften.  They will create their own moisture so there is no need to add water at this stage.  We are just softening the veggies.  When they start to stick to the pan, add about 100ml hot water.  Now add your chicken carcasses to the top.  


Add hot water to just cover the chicken carcasses.  This may be a litre or two, depending on the pot size you use, so be ready to refill and reheat the kettle.


Add a good pinch of Murray River Pink salt, cracked or freshly ground pepper, a teaspoon of Massel chicken stock.  Cover and bring to the boil and then reduce the heat to the lowest possible setting and leave for one hour.  


After an hour, remove the chicken carcasses, keeping any chicken meat you can extract.  Then toss the remainder of the carcasses away.  The soup will be ready, but fairly heavy in chicken fat!  There are several options now to remove the fat:


1.     Place the soup in the refrigerator overnight and remove the floating chicken fat with a spoon when it has settled the following day; or

2.     Let the soup cool a little, place ice into a metal ladle, place the ladle gently into the hot soup. The fat will stick to the bottom of the ladle!  Brilliant:

https://www.youtube.com/watch?v=MYugpggPaTs

3.     Let the soup cool, place an ice cube into the soup.  The fat will stick to the ice cube.  Remove it before it melts!


Serve with warm crusty bread.

Roasted Roots

Inspired by the Hemlock post, I decided to roast five root vegetables.  The vegetarians and vegans will enjoy this very much, as will the carnivores!

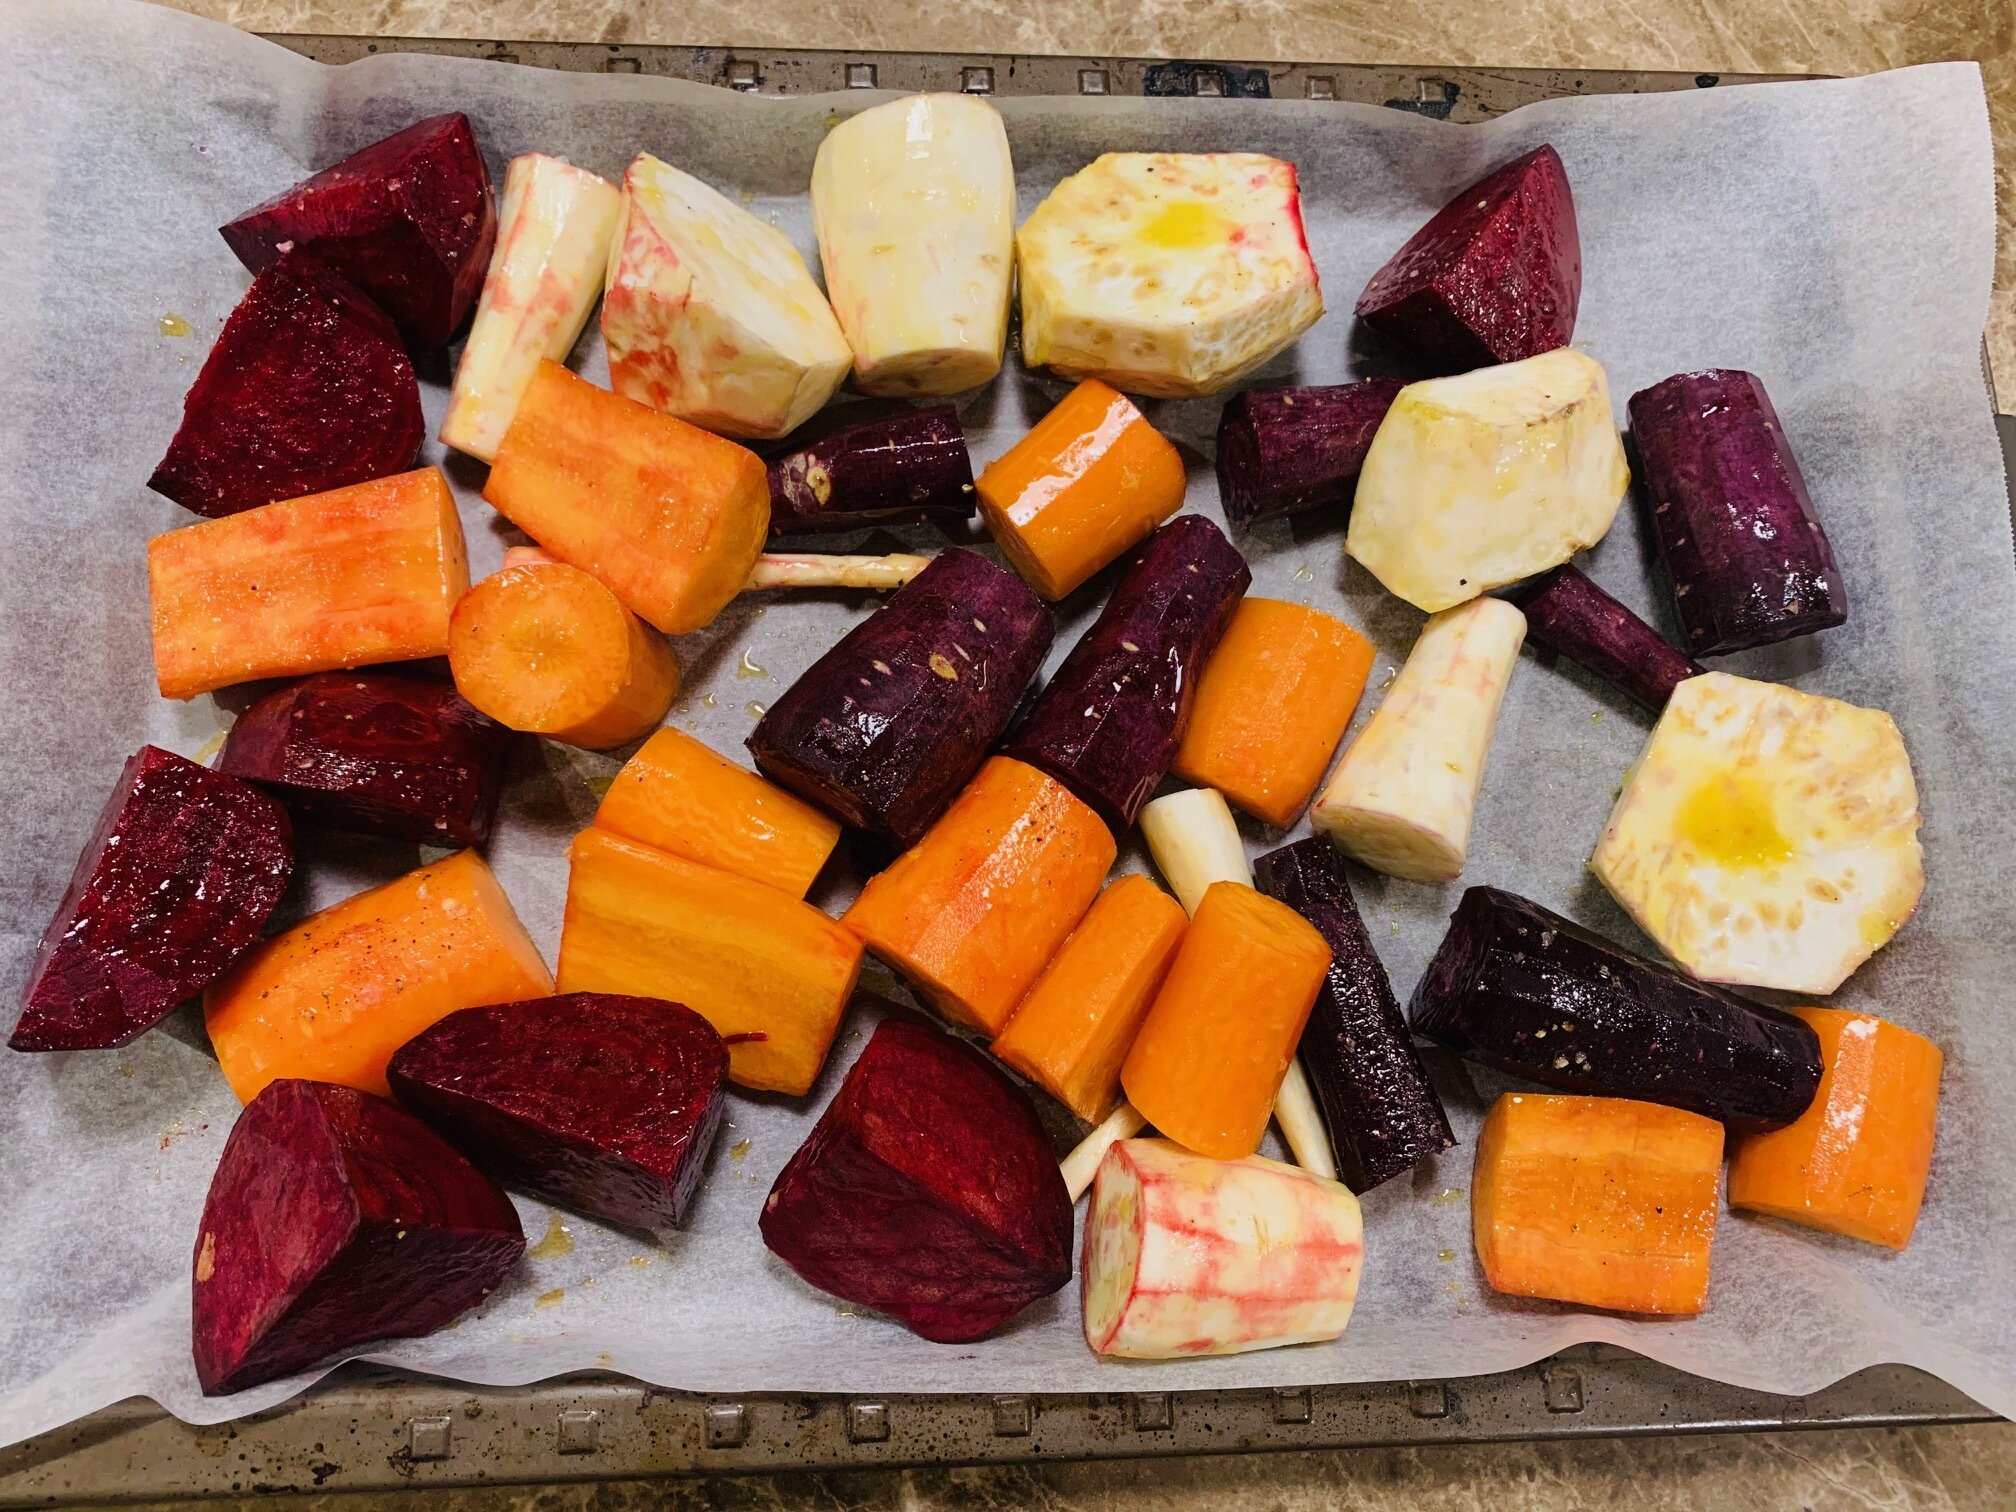
I selected orange carrots, purple heirloom carrots, parsnips, celeriac and beetroot.  I peeled them and cut them into large pieces, then lightly covered them with olive oil, sprinkled Murray River pink salt and freshly ground pepper.  I roasted them for about 45 mins at 200c alongside another tray of roast pumpkin with sweet potato and a bacon and parsley quiche. 

Well, the root vegetables were fantastic.  Slightly blackened, the carrot gave a sweet taste, the celeriac and beetroot were perfectly cooked, nicely soft and full of flavour.  The purple heirloom carrots had less flavour than the orange carrots and the parsnip was excellent.  I had not eaten parsnip for a few decades, but I enjoyed it more tonight than I did when I was seven years old!

Several of these roots have already offered their green tops for other vegetables, so in a way you get two meals from the one vegetable.  As mentioned earlier today, I would like to grow some parsley so I can eat the parsley and then pull the root and roast it too.  The celeriac did not taste like celery, so I expect the parsley root will not taste like parsley.

Given the range of colours in which carrots can grow, tomorrow I’ll post an interesting piece about why the orange carrot is the most prolific of all the carrot colours and why it should be called the ‘heirloom’ carrot as opposed to the purple, yellow and white varieties which have been given that title.

Eat well, stay well.

Kind regards,

Brendan Blake


IMG_2688.jpg

The Brendan Burger

Tonight was burger night. A self-serve, create your own burger from the usual ingredients.

I made six big meatballs from 750g premium beef mince, one chopped onion, a handful of breadcrumbs and one egg. Cracked pepper and Murray River pink salt of course.

The balls were flattened and pan fried in olive oil for about 5 mins. Meanwhile the Tip Top burger buns were split into two (a top and a bottom) and gently toasted in the oven grill.

Once the burgers were cooked I used the same pan to cook six fried eggs, not flipped, and laid a piece of melting cheese on the egg before they were removed. Too easy!

Brendan's Construction: buttered bread base, chopped iceberg lettuce, meat burger, tomato sauce, egg and cheese, then the top bun.

I had a can of beetroot and pineapple rings awaiting opening, but it's not summer, so they stayed in the can for another day.

I took one bite and said 'good burger'!

Easy to make at home, kids love them and they are healthy! All the food groups are represented: protein, carbohydrates, sugar, a little fat and a lot of flavour!

Make them on the weekend. Get the kids involved. The sooner your children learn to cook, the sooner you can handball the task!

Stay well, stay safe.

Kind regards,
Brendan Blake

IMG_2594.jpg

Six large meatballs

750g premium beef mince, one onion, breadcrumbs and one egg. Salt and pepper of course.

IMG_2596.jpg

Minced Pork and blistered beans

Tonight’s minced pork dish is made in two parts, the beans and the pork.  Both have to be cooked on high heat.  The beans have to burn and blister and the pork has to be dry fried so it accepts the sauce.  At the end they are all added together to make very memorable dish.

Both pans should have a sesame oil base as opposed to the regular olive oil.  Gently pan fry the spring onion, garlic and minced ginger.  I grated my fresh ginger using a zester over the pan.  Once they are nicely cooked, add your minced pork and turn the heat up high. 

 Whilst the pork is cooking add your fresh beans to a different pan and turn up high.

Now make your sauce.  ¼ cup chicken stock, (I used the powdered Massel chicken stock with hot water) a tbspn of Hoi Sin sauce, a tbspn of cornflour (I didn’t have any so I used plain flour), a tbspn of white wine vinegar, a tbspn of soy sauce, a tbpsn of Chinese cooking wine, if you have some and a tbspn of Oyster sauce.  The recipe required a tbspn of sugar, but I skipped that.  Stir it all up and when the pork is brown or charred, add the sauce to the hot pan.  It will thicken quickly so give it a good toss around and remove it from the heat before it dries out.

At this late stage I added a chopped fresh chilli, not to everyone’s delight, but it looked good!

Pour the minced pork over the beans and eat.  I served it over Jasmine rice, with Brussel sprouts and oven baked sweet potato.  This dish is a real crowd pleaser!

Teriyaki Salmon

Q. What can you do when you want to cook Teriyaki Salmon but the only Teriyaki sauce available is a thick sugar laden marinade?

A. Make it yourself!

So I made the most fantastic Teriyaki sauce that I use to cook salmon fillets on the stovetop. This cooking sauce was so good I actually said 'this is the best salmon I have ever had'.

I don't always measure ingredients. Work with me...

1. a good pour of Mirin (Sweet cooking Rice Wine);
2. the same quantity of sake (or cooking sake which is what I had);
3. the same quantity of soy sauce;
4. the same quantity of hot water; and
5. about a tablespoon of honey

Mix it all together.

To coat your salmon fillet: leave the fillet(s) in the plastic bag. Open the bag. Sprinkle into the bag some freshly ground pepper, a pinch of Murray River Pink Salt and about two tablespoons of plain flour. Fill the bag with air and give the top a twist until it is sealed. Now shake the air filled bag (like a lunatic) for about 10 seconds until all the fillets are completely coated. No mess, no fuss.

In your medium temp heated frypan, splash some olive oil to get it started. Place the salmon fillet skin side down. Pour into the frypan half your homemade Teriyaki sauce and let it gently simmer. Move the fillet about so it doesn't stick to the pan. After about two minutes flip the fillet and pour the rest of the sauce into the pan. Progressively turn the fillet over onto each of the four sides. If the sauce becomes sticky or dry, add a little hot water which will re-create your initial sauce.

When it looks cooked, eat it.

Reports please people...

Stay well, stay safe.

Enjoy and develop your cooking skills over this time. Every cloud has a silver lining...

Kindest regards,
Brendan Blake

Teriyaki sauce - made at home!

Teriyaki sauce - made at home!

The coveted Pork Belly

Inspired by the range of Mother’s Day roasts the butchers created last week, I thought I should cook a pork belly because I have not cooked one for some time and it tastes very good.

I researched a couple of recipes and created a hybrid of two, which I probably should not have done, but it worked out well.

The rind was already scored by the butchers so my first task was to place it on a wire rack and pour boiling hot water over the rind. This opens the score lines, into which I rubbed olive oil and loads of Murray River Pink salt.

The oven was preheated to 240c. I cooked the belly on the wire rack in a baking dish, with a little water in the dish for tenderness, uncovered for 50 mins at 240c and then turned down the heat to 160c for a further 25 mins. I rested it for 10 mins and sliced it to serve. Easy!

The rind crackled a bit. Had I not placed water into the base of the pan to ensure its tenderness it would have crackled more but it was still good (and moist!).

The vegetables were largely chopped Pontiac potato, sweet potato, skin on carrot, two shallots and for a bit of colour I added some broccoli. All tossed in olive oil. I placed the veggies in the oven with the belly and removed them at the 50 minute mark. They were deliciously soft. The broccoli, which I had never roasted before, shrunk in size and burnt a little but was really tasty.

The Brussels sprouts were done as usual, in oil and butter in a hot frypan on the stovetop.

Don’t fear the pork belly. It is possible to achieve this meal with little cooking experience.

IMG_2535.jpg
IMG_2530.jpg

Traditional cloth wrapped Plum Pudding

Why do we have to eat wintery foods in summer at Christmas time?  We are not in Europe and the snow is not falling.  July seems to be the best time to enjoy these delights, so given the time to prepare, I thought I’d make a traditional plum pudding, or two, to eat in July when it is very much required!    

Now, this is not a challenge to you excellent food makers, but people have been asking me for meals and dessert ideas, so why not challenge yourselves!  I found making these puddings very easy.  I had not made one before.

I created a hybrid of two recipes, one from Australia, the other from the UK.  For those who are interested, the two recipes I chose are listed here.

https://bakingwithgab.com/2013/12/20/christmas-and-pudding/

http://www.paulcouchman.co.uk/how-to-make-a-traditional-christmas-pudding-in-a-pudding-cloth/

My ingredients were:

450g raisins

450g currants

200g sultanas

300g shredded apples

50g glace cherries

250ml St Remy brandy

450g butter

500g brown sugar

8 eggs

350g plain flour

1 tsp nutmeg

1 tsp mace (I’ll deal with Mace in a separate post)

1 tsp mixed spice (heaped!)

50g chopped almonds

250g breadcrumbs

¼ tsp bi-carb of soda

Pinch of salt

For two days I soaked the raisins, sultanas, currants, mixed peel and chopped almonds in brandy.  I left the bowl on the bench, covered with clear film.

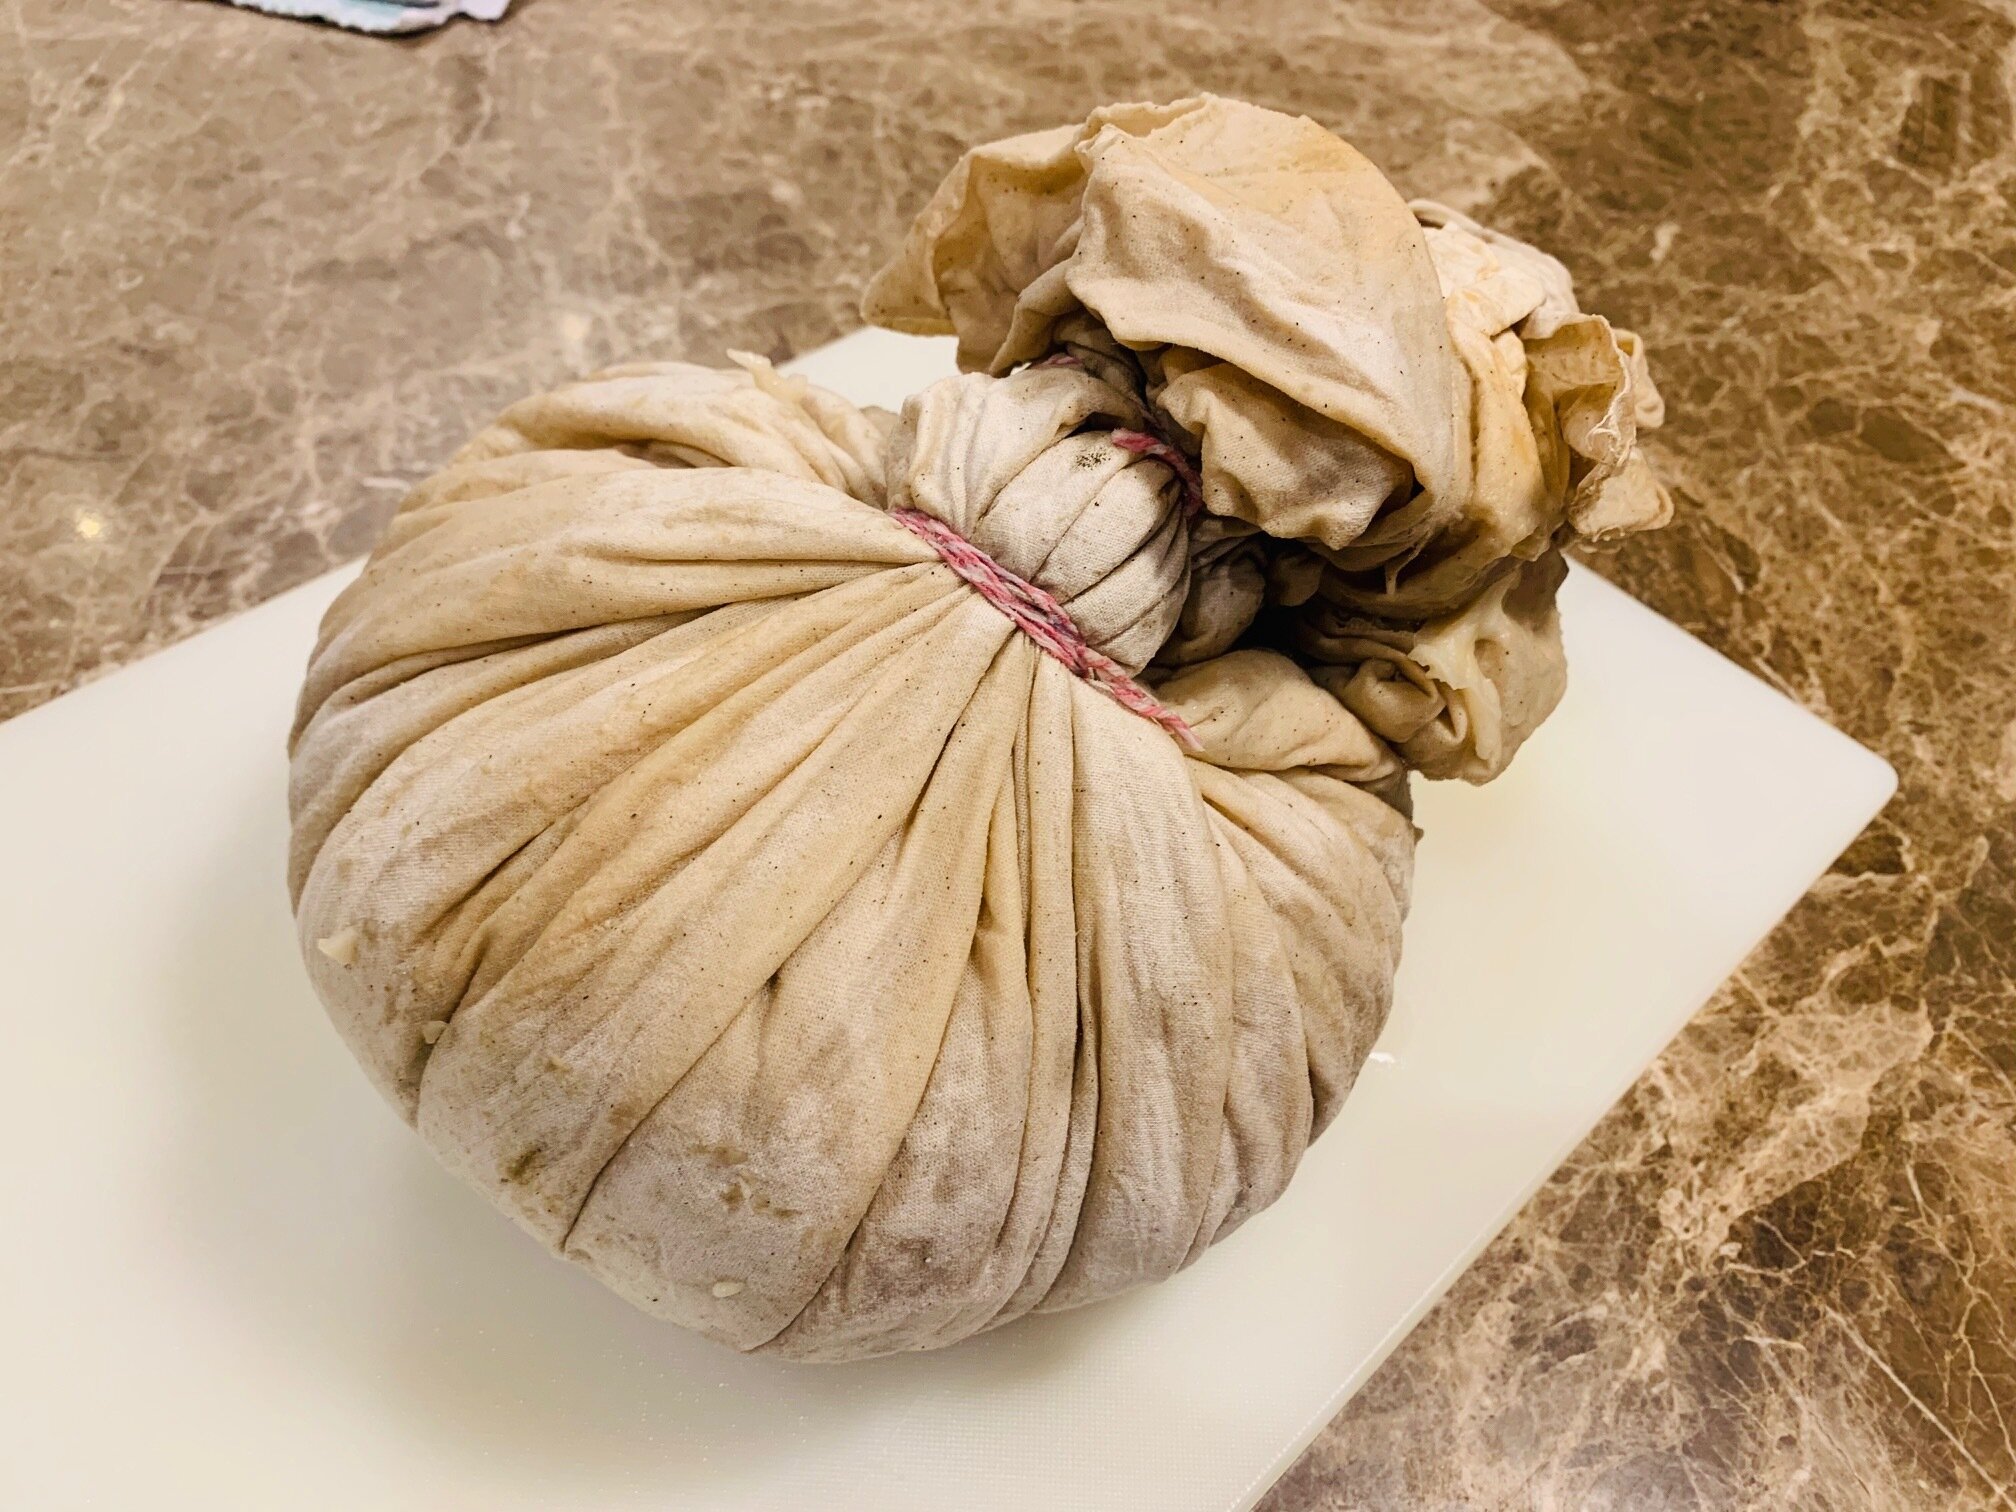
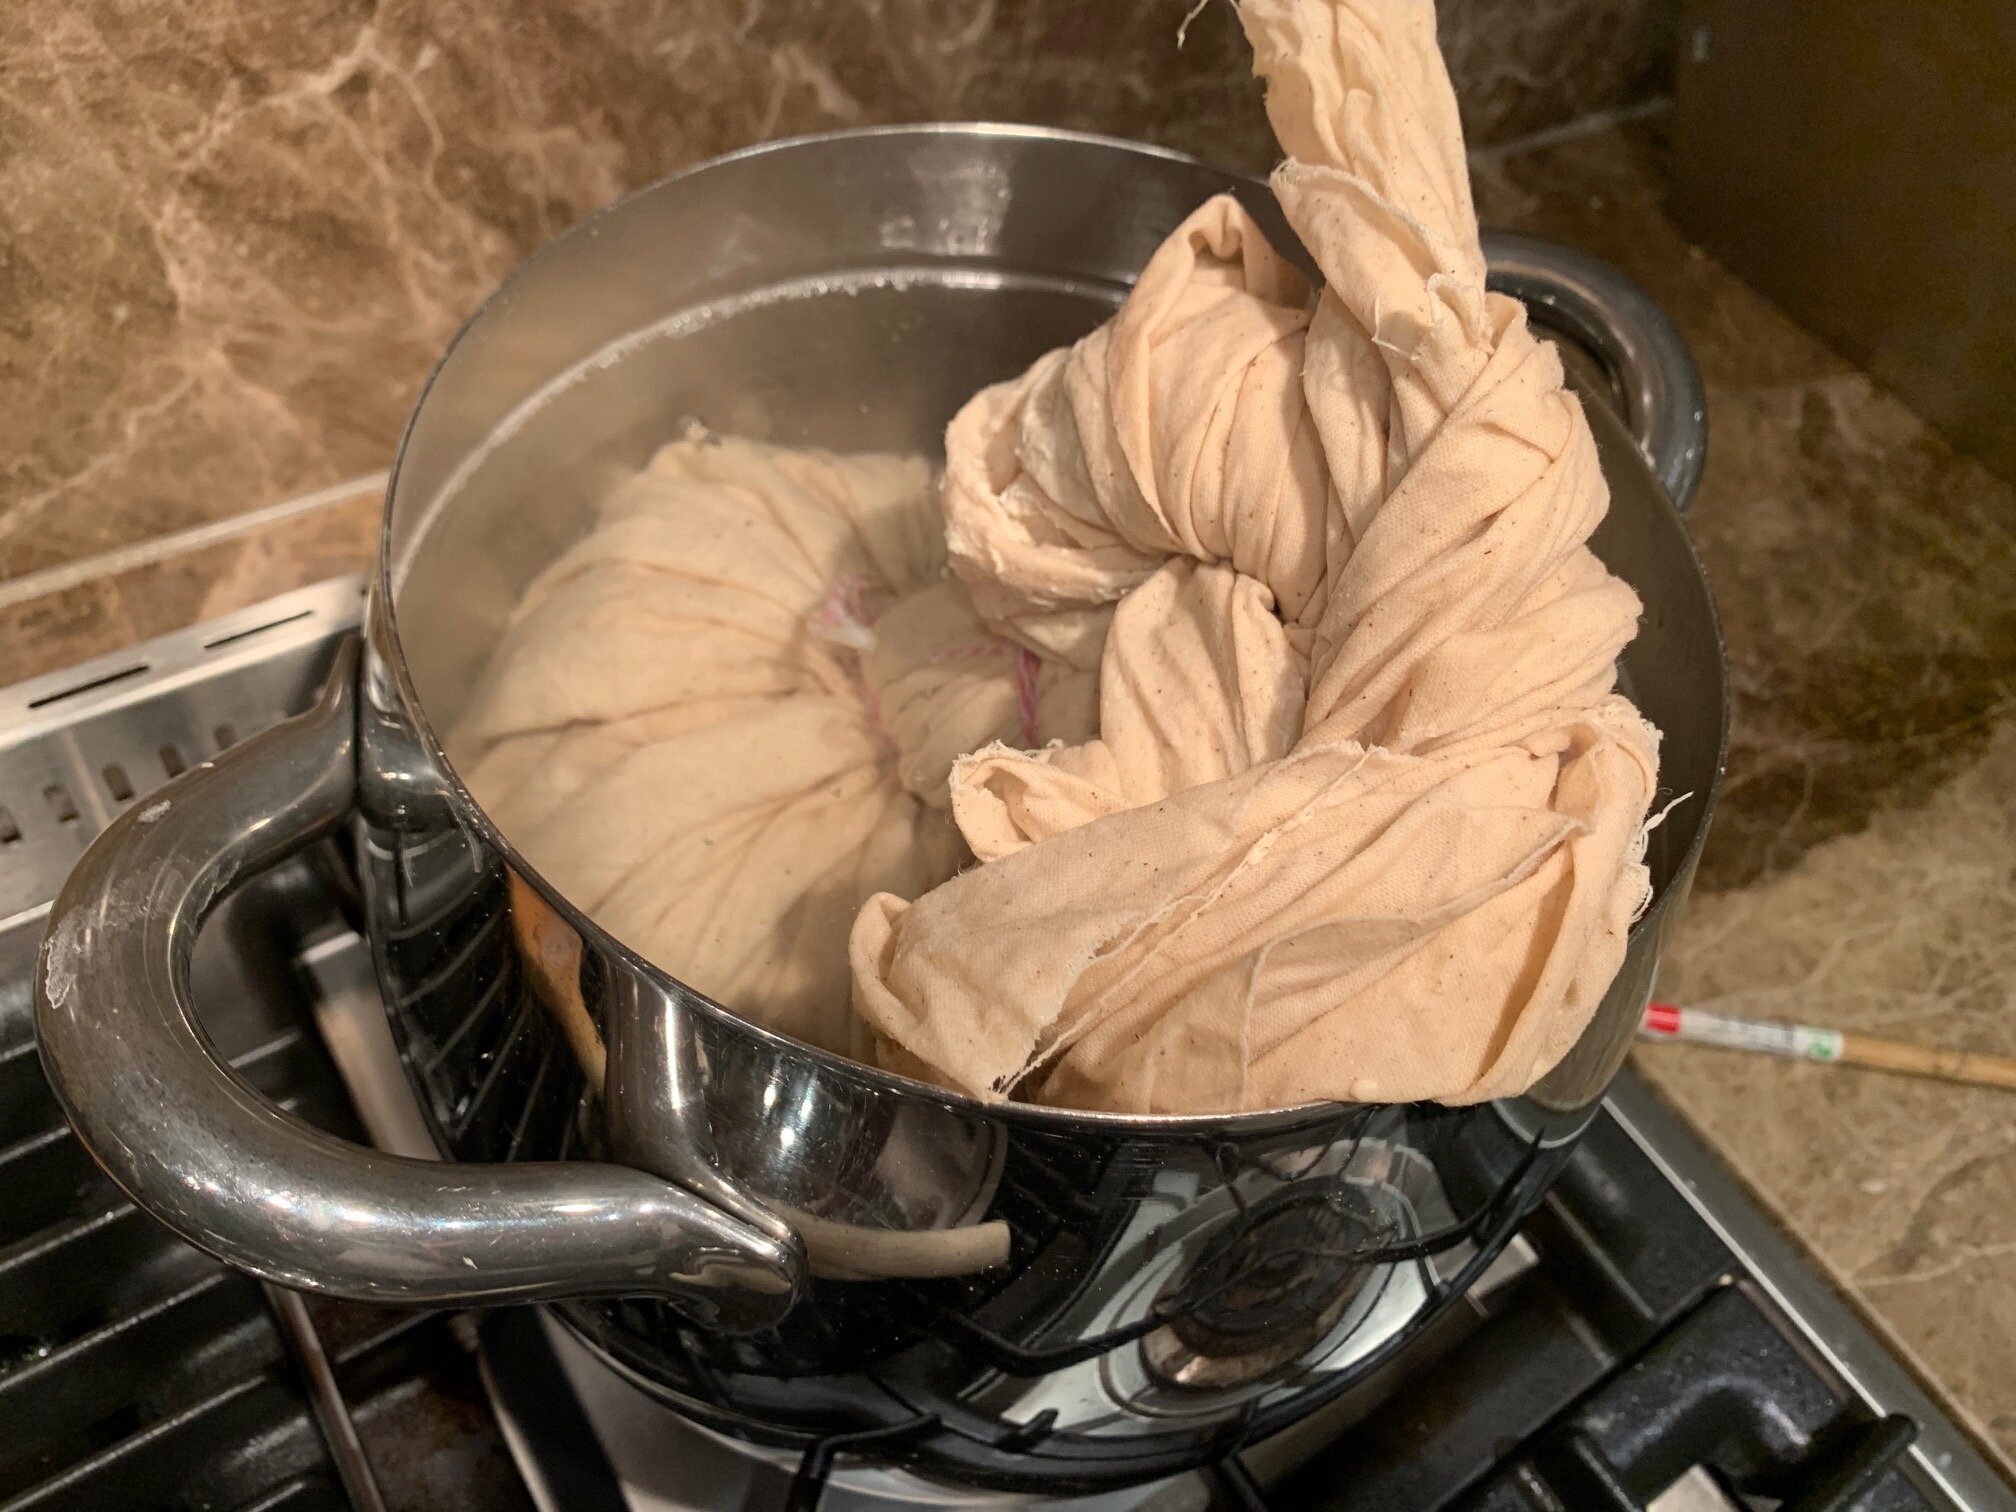
Before I started to assemble the pud, I cut and boiled two lengths of calico.  Calico is in abundance at Spotlight.  A roll costs about $10.00 and it can make a lot of puds. The calico needs to boil for 20 mins in water to sanitise it and encourage the fibres to swell.  It was ready to come off the stove when the mix was ready to be put into the calico.  Once the calico is wrung out, which is a memorable task due to its intense heat, it needs to be laid over the sizing bowl and dusted with flour.  The flour absorbs into the fibres and seals the calico.  This stops the brandy from escaping!  

As I assembled all the ingredients, I mixed the butter with the sugar in the mixer.  I beat 8 eggs separately and left them in a bowl, I measured my bread crumbs and flour then added the nutmeg, mace, mixed spice, bi carb and salt into the flour bowl.

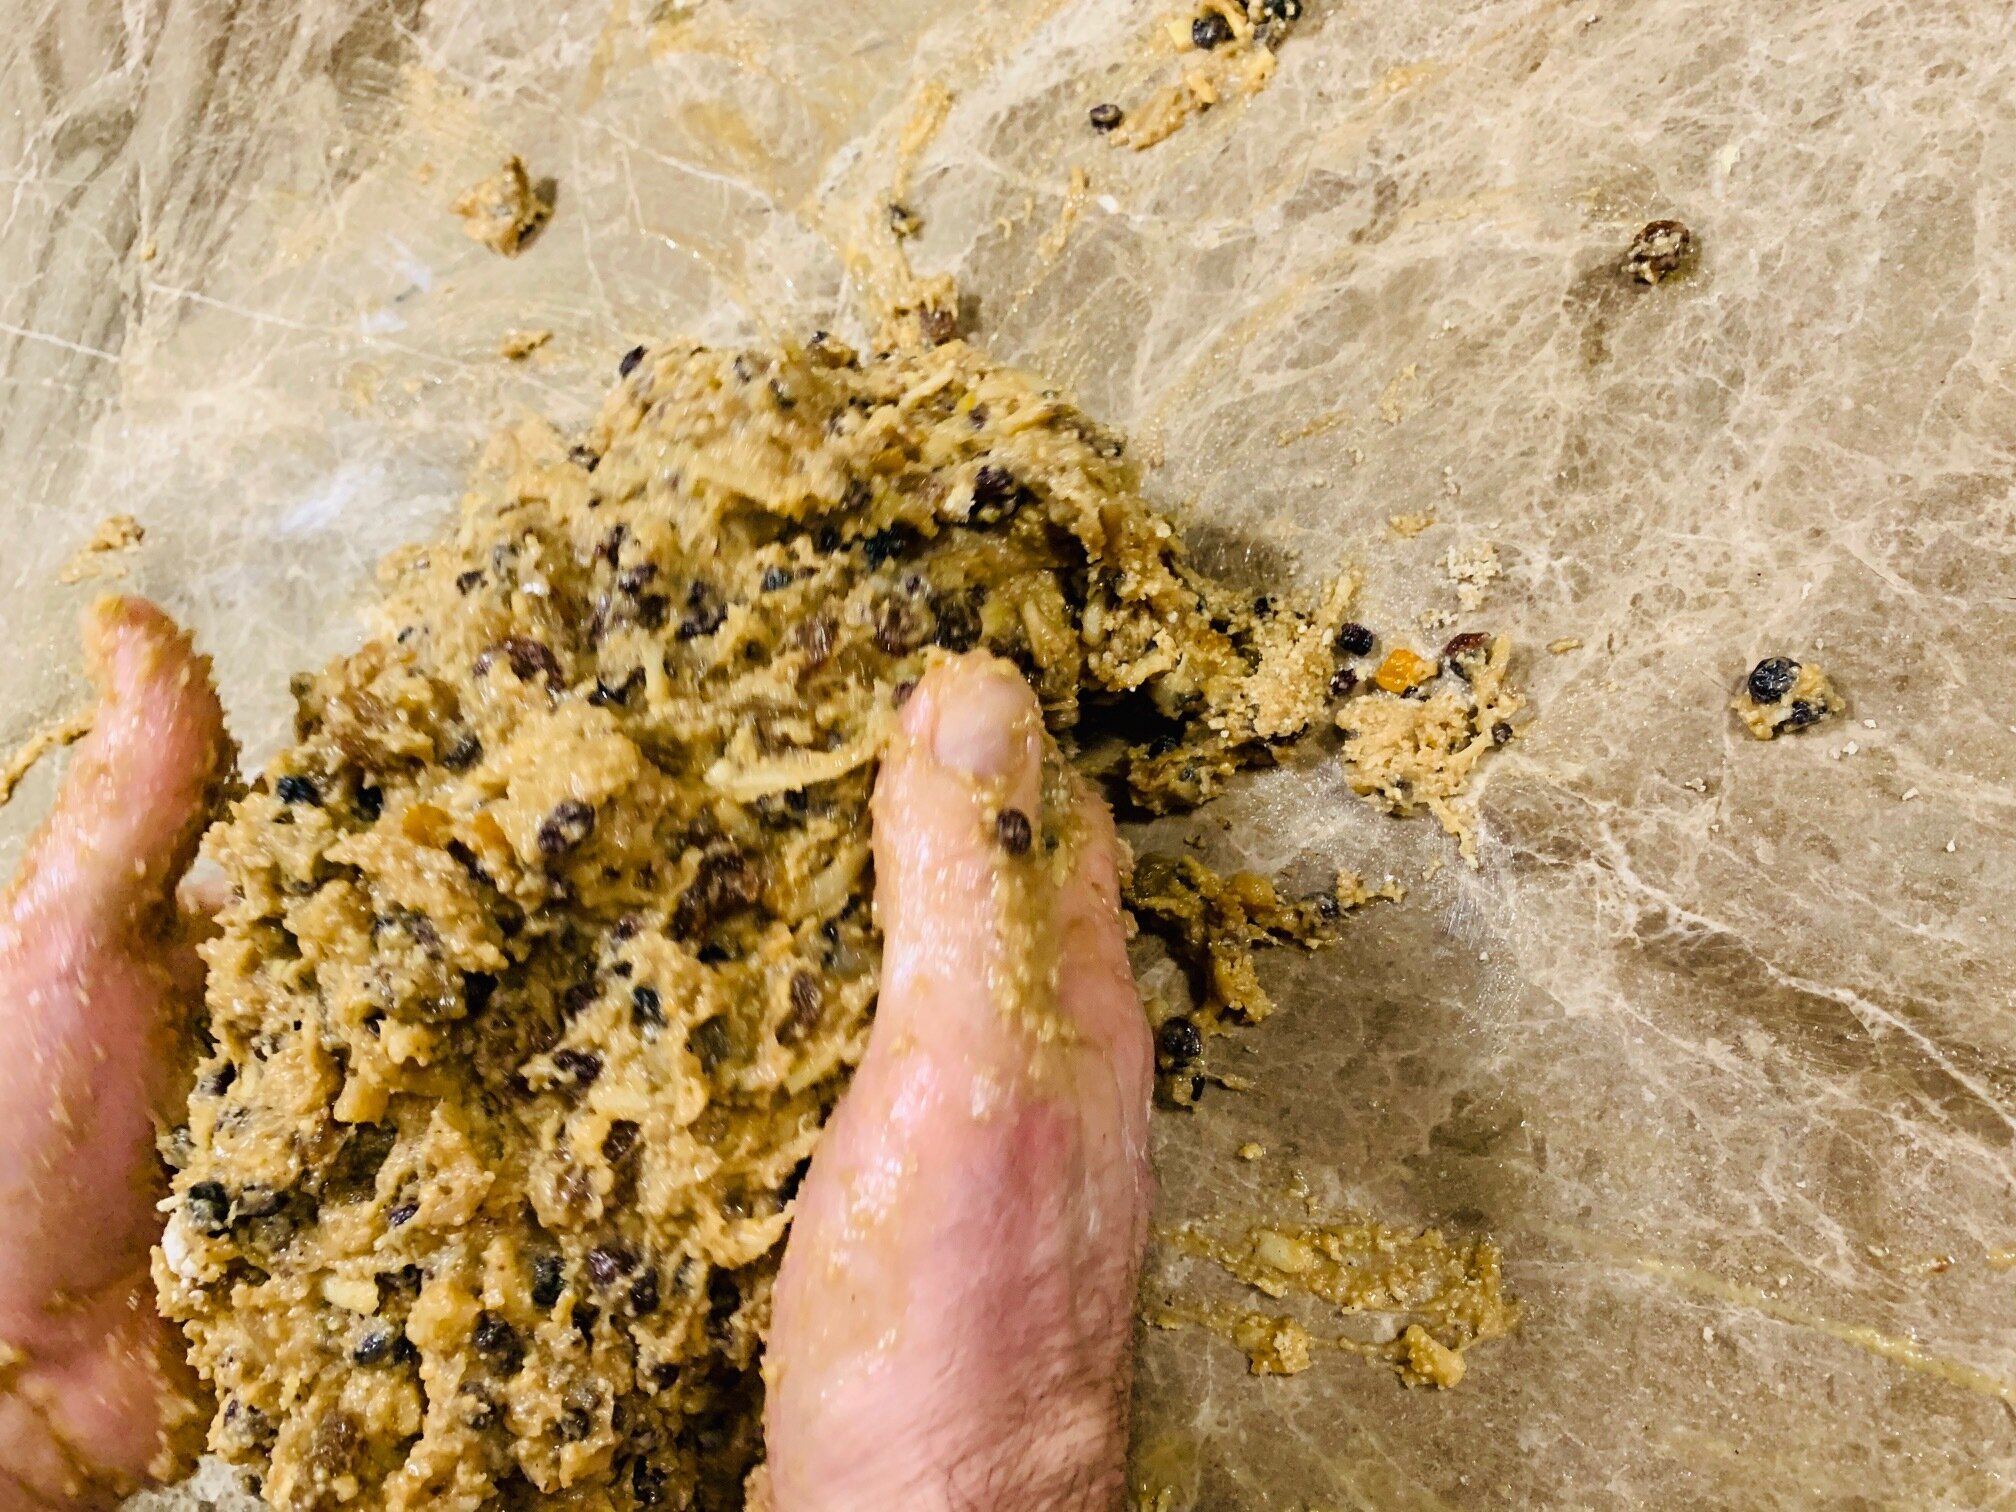
I tipped the lot onto the bench and blended it all by hand! Who needs a bowl when you have bench? I separated my mass of uncooked pudding into two separate bowls and cleaned the bench.  Calico time:

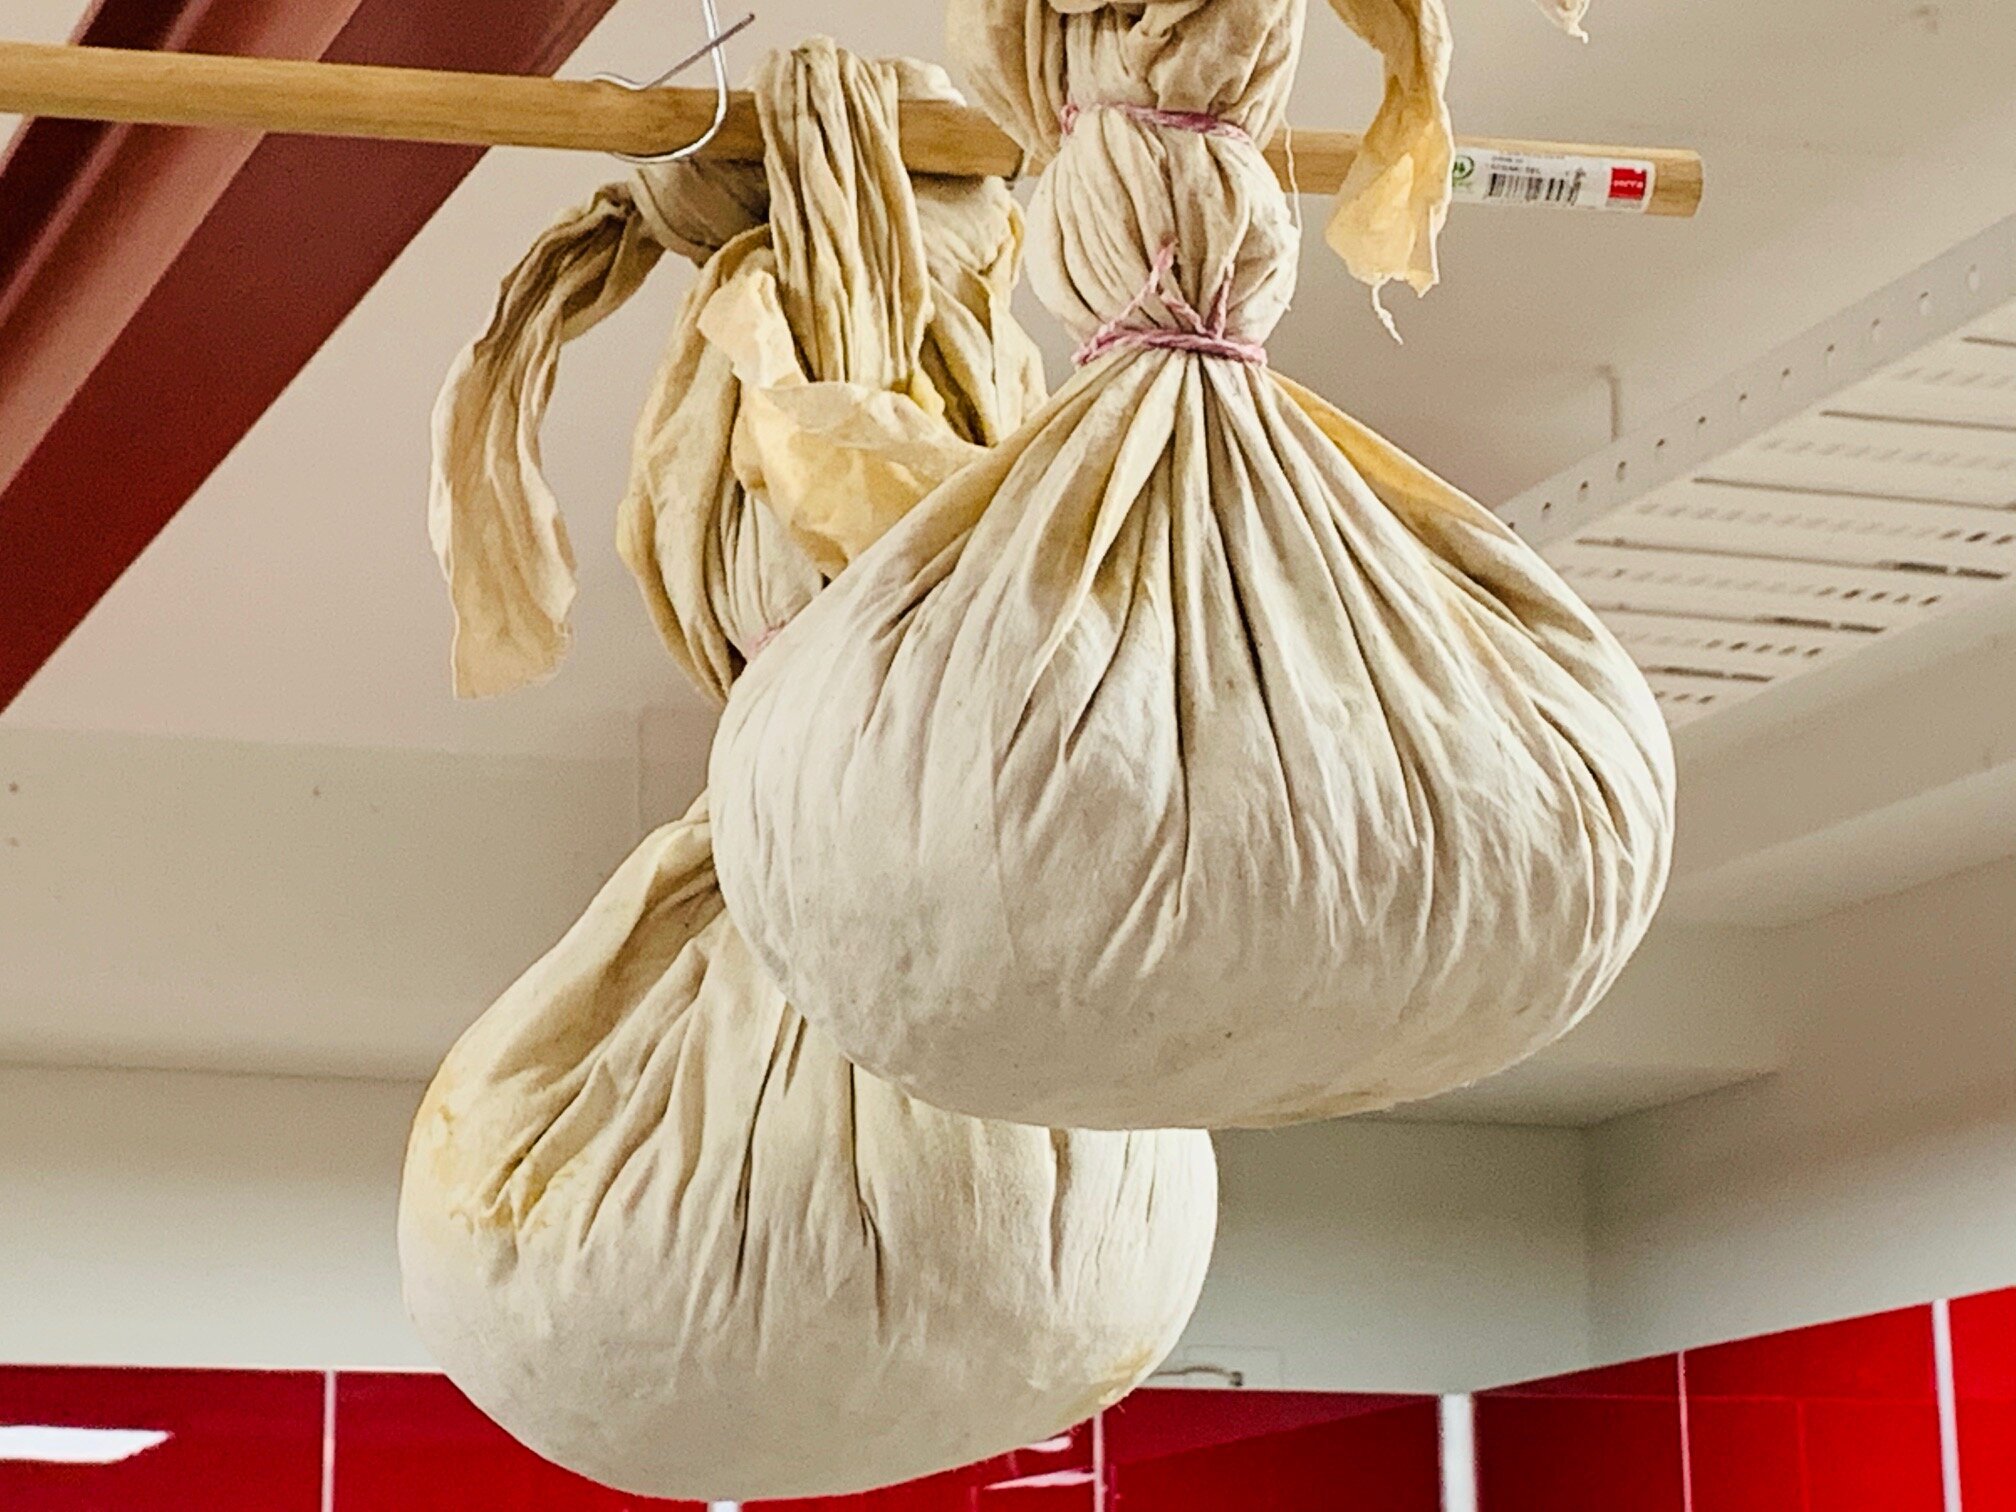
The calico was laid over the bowl, dusted with plain flour, mixture inserted and then tied twice with cotton string.

I then put them both into boiling water where they currently sit and will remain for 3.5 hours.  Once the water boils, the heat can be turned down to very low and the water will continue to boil, making the energy cost relatively low.  It requires a top up of hot water from the kettle every hour or so.

After 3.5 hours of boiling, I removed them from the stove and hung them in a ventilated outdoor area (garage) where they will remain for about 2 months.   

Christmas Day

In the morning of the day they are to be consumed, remove your pudding from it’s resting place, boil in water (in the sealed cloth) for three hours. Remove it from the water, allow it to drip dry for a few minutes and then put it aside to cool. It needs time to reach room temperature, probably about two hours. Don’t open the cloth until it has cooled to room temperature. To remove the cloth, cut the wrapped seal and gently peel the cloth away from your pudding, ensuring nothing breaks off. Place it, inverted, onto a serving plate. It is now ready to serve.

You need to prepare the standard whipped cream or custard (or both), but you will have ample time to prepare these sweet condiments whilst the pudding is settling.

To light the pudding with brandy, this is what you do: using a metal soup ladle, place a generous quantity of brandy into the ladle. Do not fill it to the top. Light a flame, preferably the stove top flame and gently warm the brandy in the ladle over the flame. After about ten seconds, simply tilt the ladle and the brandy will ignite!

Pour the flaming brandy over the pudding. If your guests thought it was a spectacular sight and they want to see it again, simply collect the brandy from the pudding plate and do it again. The brandy will ignite multiple times!

Enjoy!


How to cook Brussels Sprouts

Cut the sprouts in half (long ways) heat up your fry pan and place a slab of butter and a good pour of olive oil, for Vegan, hold the butter (if you have some!). Pan fry hot and quick until the sprouts a slightly charred, but retain their bright green colour. Add some cracked paper and Murray River Pink salt.

They are ready to eat. They are hot and crunchy and delicious!

Bull Horn Peppers

They only look like bull horns. They are genuine vegetables.

Place them straight onto a high naked flame on the stove or barbecue. Using tongs, turn them over every couple of minutes. They will blister and then turn black. Once they are black remove them from the flame, place them on a board and remove the charred skin with a butter knife. The skin will peel or scrape off easily.

You can add salt and pepper or olive oil, but without any other additions, they are good to go as they are.

Tomato and Basil soup

Tomato and Basil Soup (Veg and Vegan)

This can be served chunky or as a thin soup simply by placing it into the blender or using a hand held Bamix blender in the pot. I served it chunky!
The redder your tomatoes, the redder the soup will be. We are not going to fry the onion, so there are no fats to add to this soup.

Cut your tomatoes in half and squeeze out the centre. We are not going to use the centres or seeds. Throw your squeezed tomatoes into the saucepan with your finely diced onion with a couple of cups of water and let them reduce. Allow it to boil then turn it down to simmer, covered, with a very low heat.

In the meantime, chop your fresh basil, spring onion, garlic and Continental parsley. Once the tomatoes have started to soften and reduce, into your saucepan goes the rest with another two cups of water. At this time you can determine the thickness of the soup by varying your water quantity.

The other ingredients all merge in nicely.

Now, add a good pinch of Murray River Pink salt, some freshly ground pepper to taste, a tsp of Massel powdered chicken stock and a couple of good tablespoons of Leggo's tomato paste.

Let it simmer for about an hour. Serve it chunky or blend it for a puree version.

Serve with crusty fresh bread.

Very basilly!
Onion and Bacon quiche. No pastry!

So tonight I made an onion and bacon quiche. No pastry!

The circular onion slices and bacon were pan fried in olive oil. Meanwhile I mixed 8 eggs, 300ml of Bulla cream, added freshly chopped parsley, a sprinkle salt and pepper. I whisked it until it was aerated. I placed the onion rings and bacon on the base of a baking dish, poured the mixture on top and placed it into a hot oven at 220 C and watched it double in height. It was ready in about 20 mins.

Whilst it was cooking I sliced a sweet potato and a Pontiac potato into chips and deep fried them in a shallow saucepan of olive oil.

I cleaned and sliced two baby cos lettuces, added olive oil and salt for dressing and served it all up. Preparation time to eating...about 30 mins.

Too easy.

Good eating! 

Chicken Schnitzels

Tonight I made real Chicken Schnitzels. Everybody's favourite!

You can easily slice four chicken schnitzels from each chicken breast. Tenderise the slices lightly with a tenderising hammer and put the schnitzels aside. In mixing bowl mix two cups of bread crumbs, a small handful of freshly chopped continental parsley, half a cup of freshly grated Grana Padano parmesan cheese, a sprinkle of Massel chicken stock powder, grated lemon rind and pepper and salt.

Heat your shallow pan on medium heat without adding oil at this stage. Coat your fillets with plain flour then coat them with a mixture of a beaten egg with a dash of water (to thin it a little). Coat the fillet in the bread crumb mixture. Now add olive oil to your heated fry pan and let it get hot.

Lightly pan fry them until golden in colour and then flip them to fry the other side.

Delicious! Easy! Memorable!

Total time: about 20 mins.

Vegan Paella

By request I made a Vegan Paella tonight.

It was not a traditional Paella, but it was just as good! Over medium heat, in a deep frypan, brown a diced onion in olive oil. When browned, add two cups of arborio rice, this is a firmer and larger grain rice which is traditionally used in paella and Italian risotto.

Once the rice has absorbed the oil and the flavours in the pan add a cup of hot water which has been mixed with a teaspoon of Tumeric Powder and a teaspoon of Massel Vegetable stock or Vegeta. Add the raw kernels of one cob of corn, half a sliced red capsicum and freshly chopped continental (or flat leaf) parsley.

I was supposed to add green peas but I forgot to buy some! As the water is absorbed into the rice you will need to continue to add more. Add hot water in one cup increments until the paella rice is soft.

Add salt and freshly ground pepper of course. Lift and toss it as it cooks. Serve it in the pan.

Very easy to make.

Delicious!

Everyone loves Pizza

The base is the most important thing.

Preheat the oven to 230C. "00" type flour (very important) measure 440gms of flour. Add two teaspoons of Lowan dry yeast, a teaspoon of salt, a tablespoon of olive oil and 310ml warm water. Mix in a bowl using a wooden spoon. Once mixed, tip the dough onto the bench and knead until smooth!

Place the dough into a bowl lightly covered in olive oil and cover with clear film. Place into a warm place and let it rest for 30 mins whilst it doubles in size. If the added water is too hot or too cold the dough will not rise.

Once risen, punch the dough, knead it again for two mins and cut it into four equal portions. Roll each portion into a ball and press the base out with your fingers. Flip the dough several times and keep pressing until your base is thinly stretched, the right size and full of 'finger marks' to hold the sauce!

The tomato base is a 50/50 mix of 'Pomodoro Passato' (puree) and Leggo's tomato paste. Spread evenly leaving a 10mm edge.

The pizza mix cheese goes on next. Cheese placed below your ingredients will melt. Cheese on top of your ingredients will harden.

Add your favourite toppings, lightly pour a good coating of olive oil, add a pinch of salt and cook for about 10 mins or until the edges start to brown.

Easy! Delicious!

CWA (Country Women's Association) Italian Stew

I found this recipe about a decade ago and I have prepared it at least 100 times.

Man cannot explain why this tastes so good!

In a large pot fry four cut bacon rashers in 50gms of butter. Once cooked, remove from the heat and put aside. Then brown eight BBQ lamb chops in the same saucepan. Remove from heat. Into the same saucepan add four peeled and diced Pontiac potatoes, three quartered tomatoes, three quartered onions then add the cooked bacon pieces, add the browned lamb, a good hand full of freshly chopped flat leaf parsley, two teaspoons of Massel chicken stock, five cups of water, coarsely ground black pepper and of course salt (Murray River Pink has been my favourite salt for years).

Cover and bring to the boil, then turn the flame/heat down to the lowest possible setting and leave to simmer for three hours. Allow to cool and refrigerate the stew in the pot.

The next day remove the settled layer of butter and the meal is virtually fat free. Gently heat it in the stove and eat it!

Full credit goes to the CWA for this incredible dish. Brendan Blake

Spanish Quesadillas

I had never made Spanish Quesadillas before, but how difficult could they be?

I love them enough to know what's in them, so without looking at a recipe, I had a go. Result: Excellent! Finely dice and pan-fry a red Spanish onion in olive oil, once browned add a finely diced chicken breast fillet (or not if you prefer a vegetarian option). In a separate bowl, mash a ripe avocado and dice a ripe red tomato. Once the onion and chicken have browned, add them to the avocado, tomato and a hand full of mozzarella or other melting type cheese.

Add coarsely cracked pepper and salt. Mix it all together. This is your filling. In large a dry flat skillet on low heat, gently warm a circular wrap bread for about ten seconds on each side. Remove from heat and fill half the circle of the bread with the filling about 2cms high.

Fold the other half of the bread over the filling so your Quesadilla is a semi-circle shape. Pan-fry the quesadilla in the same skillet on low heat, dry, (no oil) for about one minute.

Flip it carefully and dry fry the other side for about the same time. Cut and eat. Delicious!

Lamb Shanks and Vegetables

Tonight I made a Lamb Shanks and vegetable dish for a friend who has little time to cook for herself. I also make another pot of the CWA Italian Stew, but I want to offer the lamb shanks recipe tonight. You will need to use a pot with a lid that can be placed into the oven.

This meal uses the stovetop and the oven in the same pot. Preheat the oven to 200 degrees c. On the stove top, in a large pot, gently brown one onion sliced into rings in a tablespoon of olive oil. Add four lamb shanks and gently brown on both sides until they appear cooked externally.

Once the shanks are brown, into the same pot add three diced potatoes, three diced carrots, a sliced head of fennel, a sliced red capsicum, two sliced celery sticks, a handful of continental parsley, a teaspoon of Massel chicken stock, cracked pepper and marine salt. Then add about five cups of water.

Gently bring up the heat to a low boil. Simmer for five mins on the stove then place the pot into the oven for one hour. The result is as you see! The lamb shanks are so soft they crumble when you try to pick them up!

A slow cooker can be used for this dish after the meat has been browned. Enjoy!