Entree

Japanese Gyoza

OK foodies, apparently my menu has consisted of food from the 1970’s, so I have had to lift my game and bring the menu forward 50 years.  Welcome to 2020!

Japanese Gyozas are fantastic.  The kids will love them!  So will the adults…

Gyoza 

500g minced pork

Gyoza wrappers (from the dairy case)

2 cups shredded Wombok (chinses cabbage)

3 cloves minced garlic

3 sprigs chopped spring onion

1 carrot, finely chopped

½ teaspoon finely chopped ginger

chopped chives (if you like)

2 tablespoons Hoi Sin sauce

1 tablespoon sesame oil

a pinch of salt and pepper

Dipping sauce

2 tablespoons water

2 tablespoons soy sauce

1 tablespoon rice vinegar

½ teaspoon sesame oil

Sesame seeds

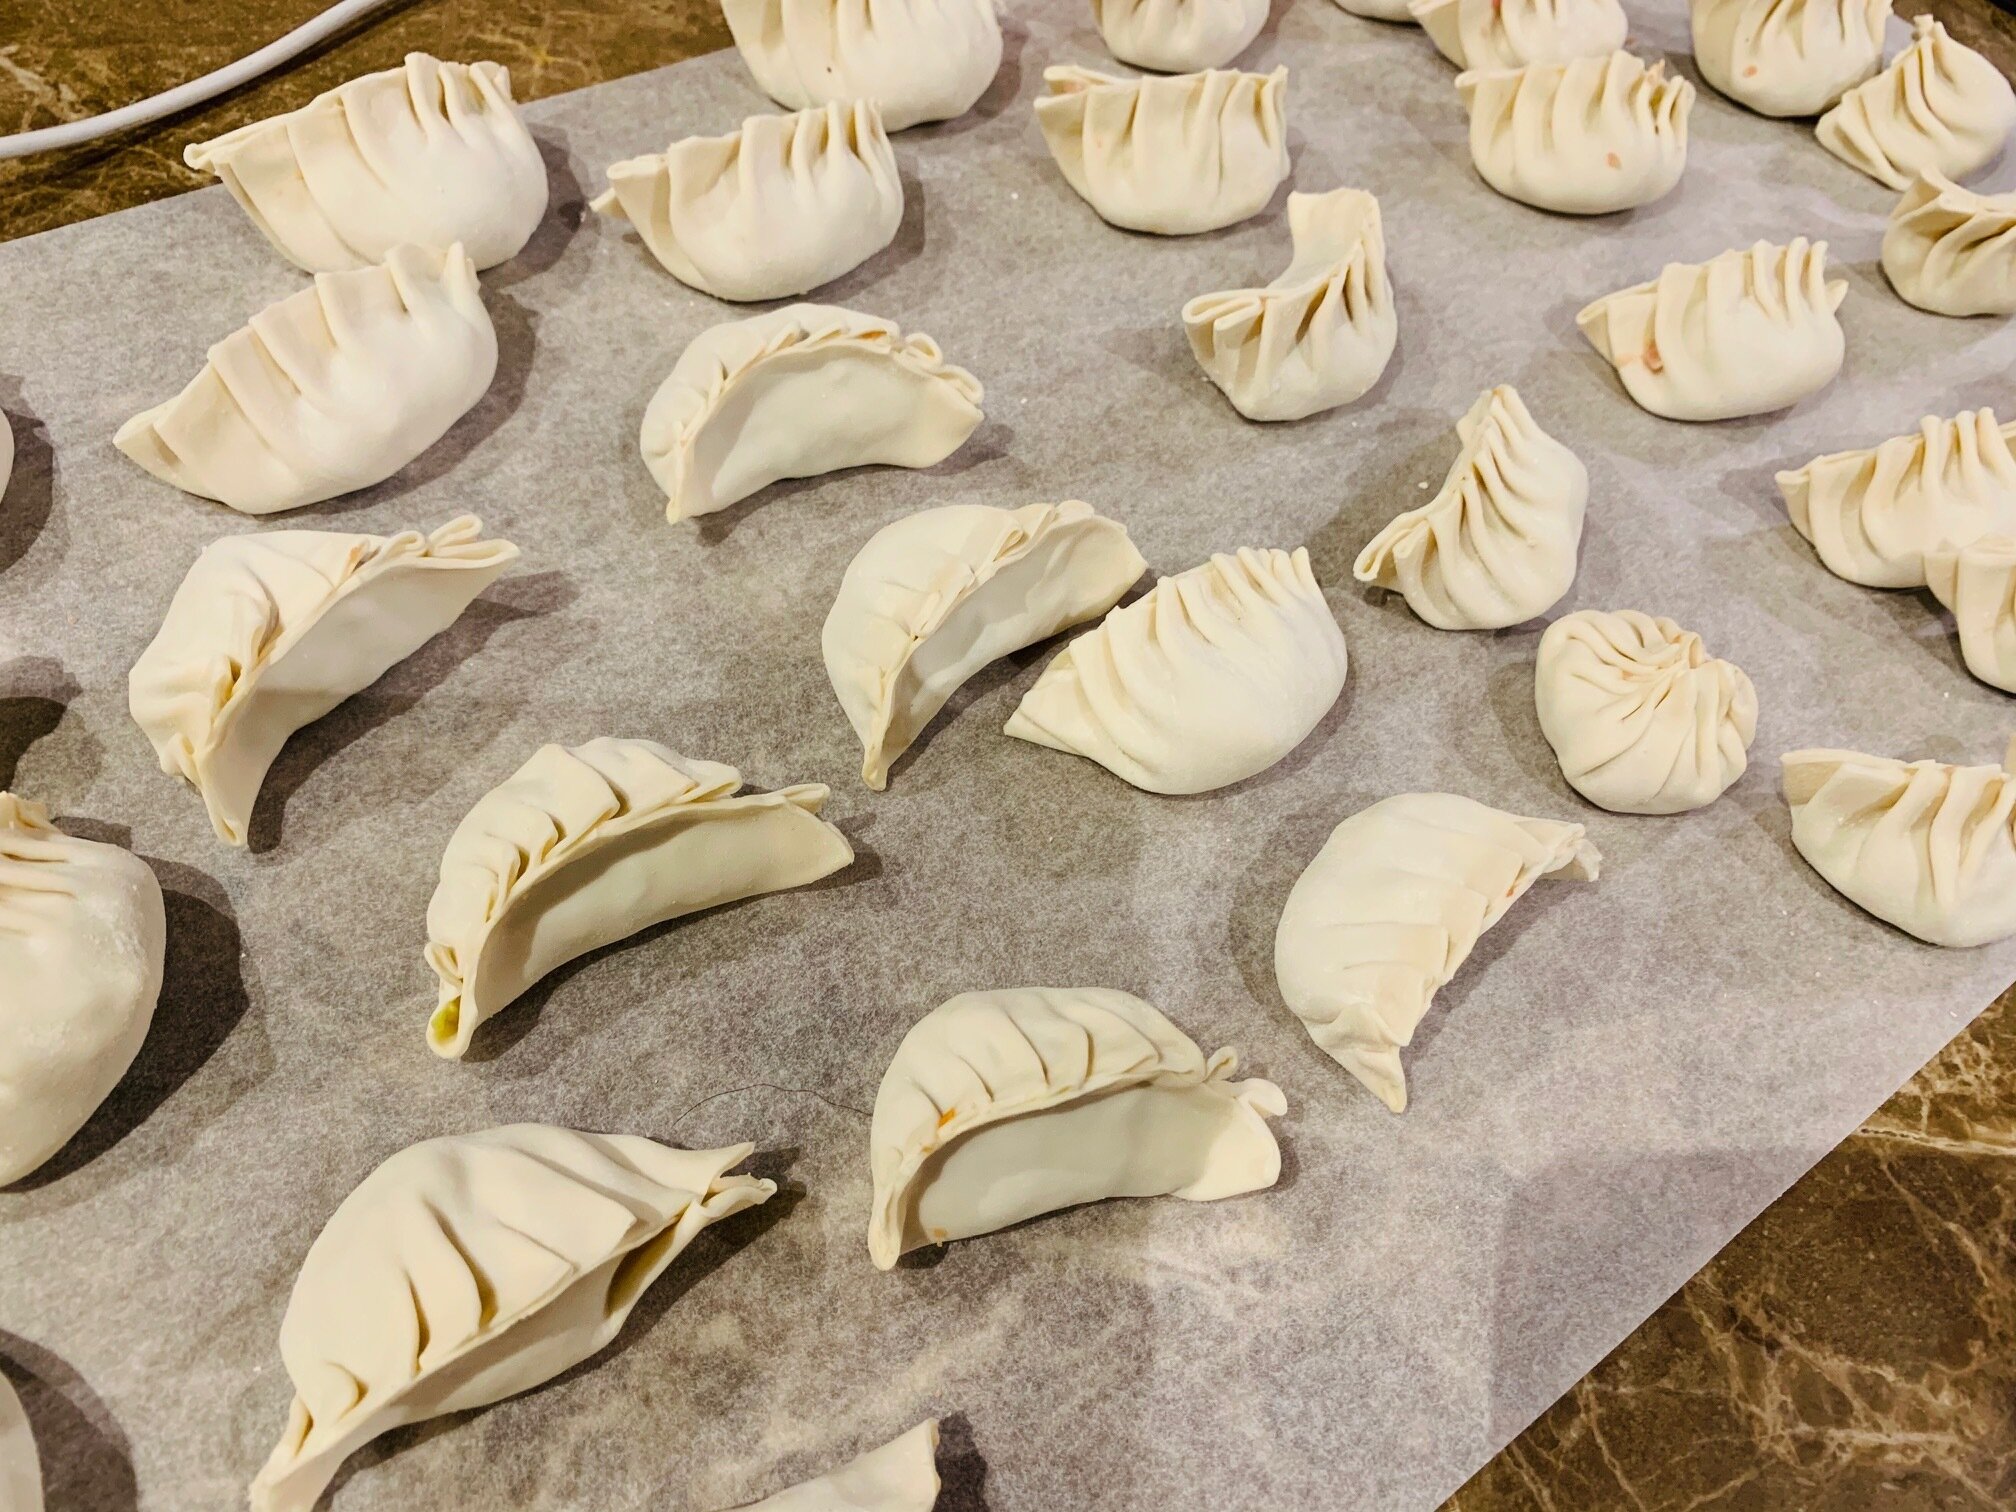
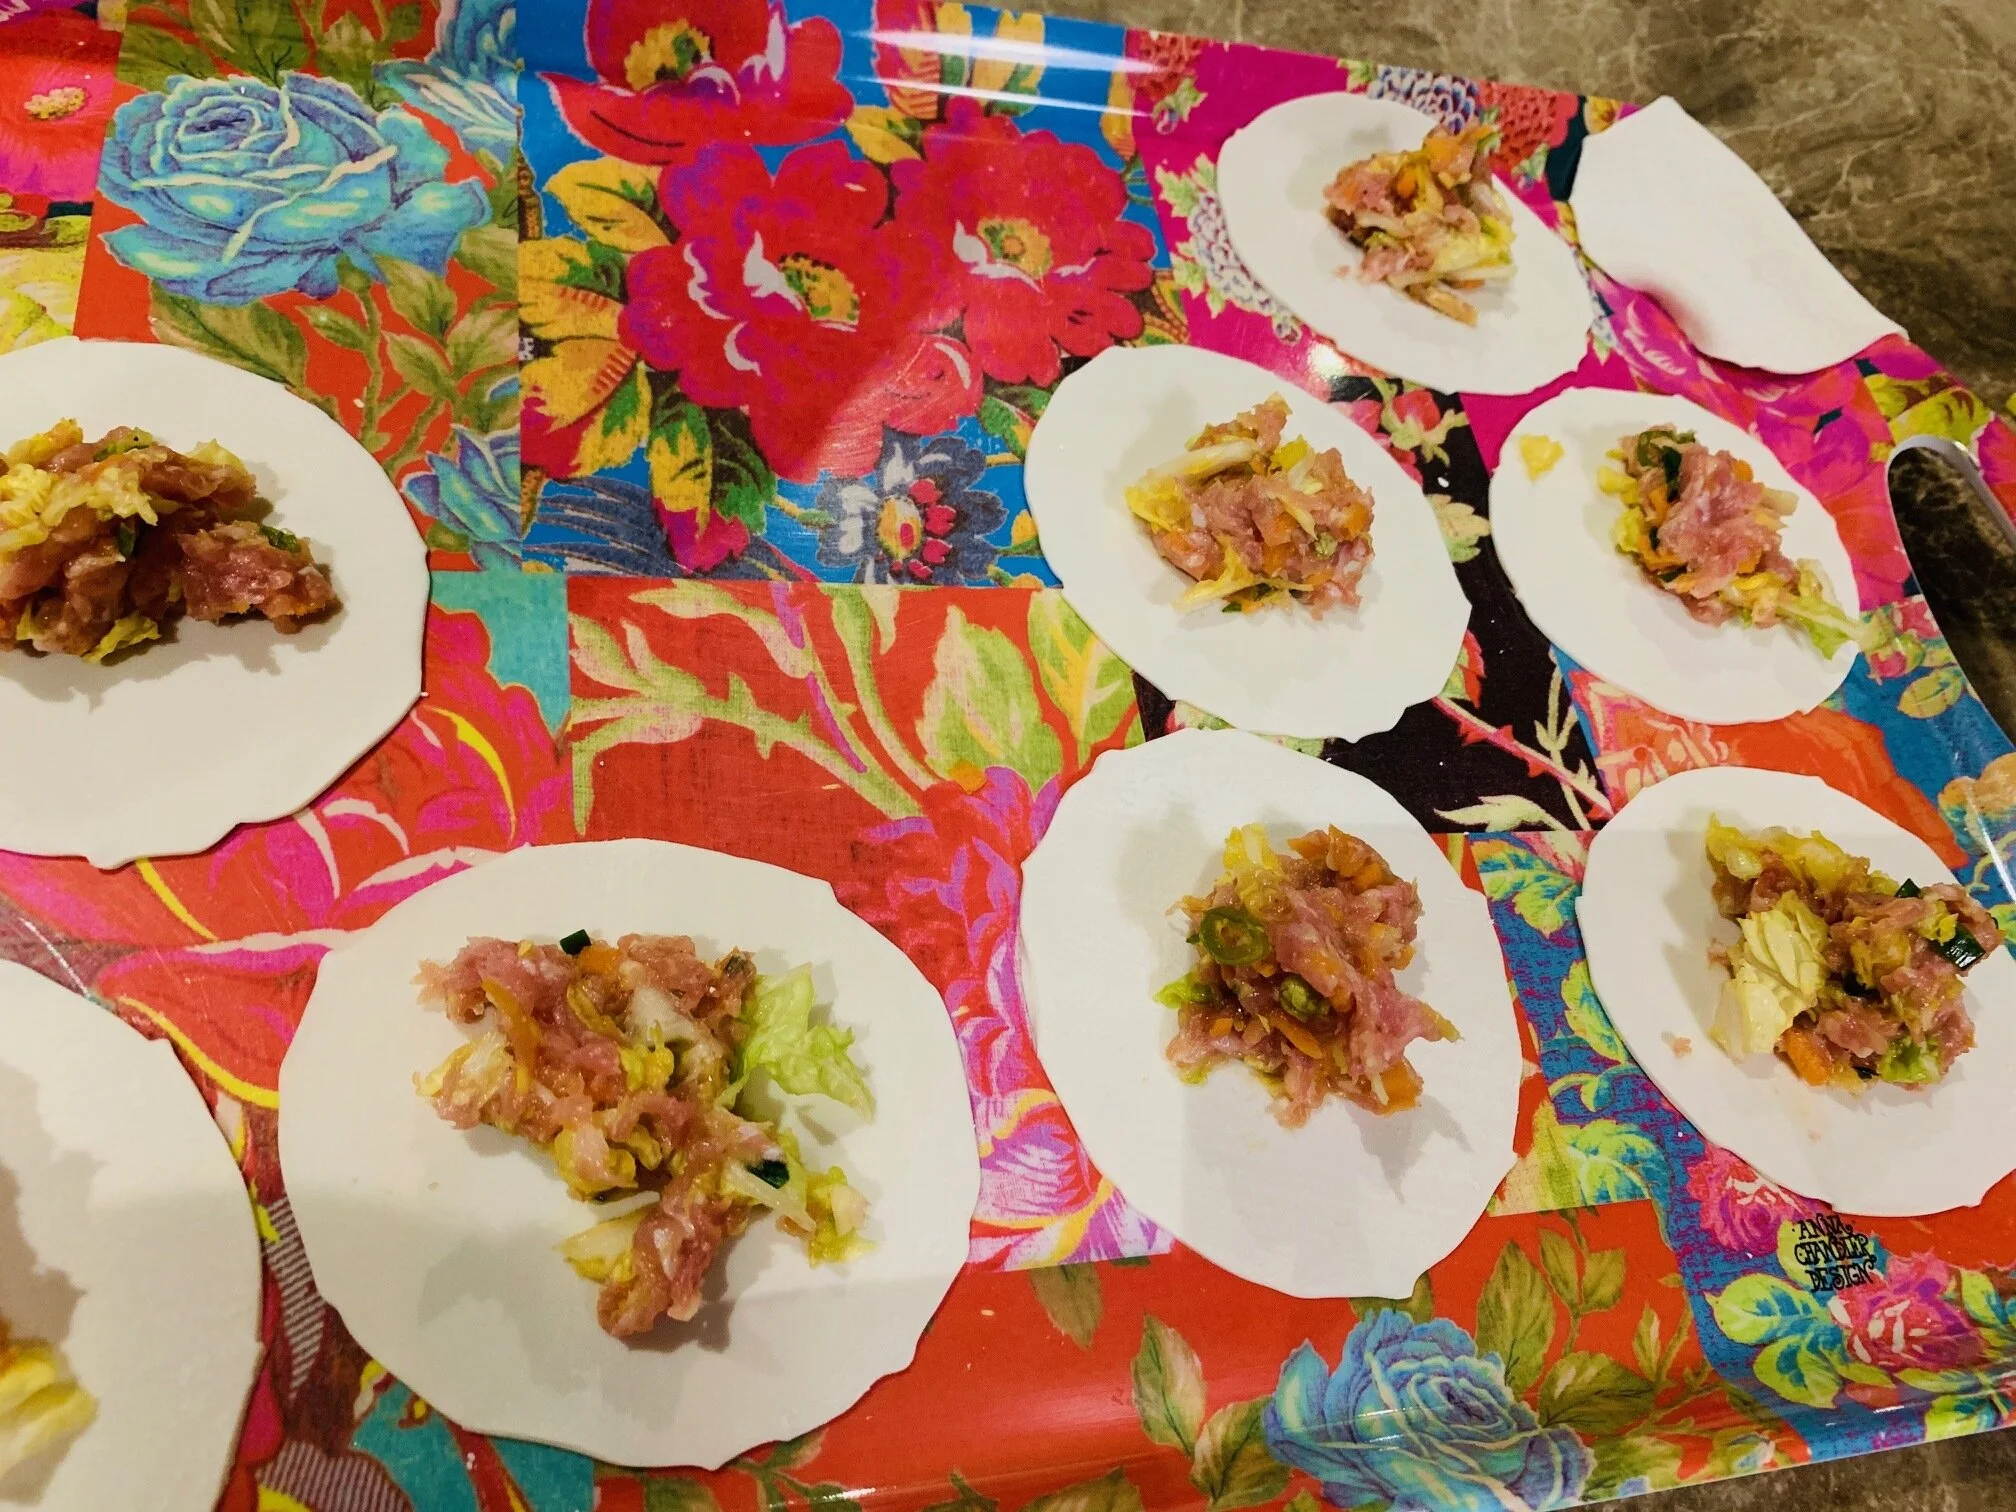
Blend all the gyoza ingredients.  Place a teaspoon of the mixture onto a gyoza wrap.

Using your hands and little water, gently fold the front side of the wrapper into the pattern as seen in the photo.  This excellent YouTube video will assist:  

https://www.youtube.com/watch?v=9uzGezdkuso

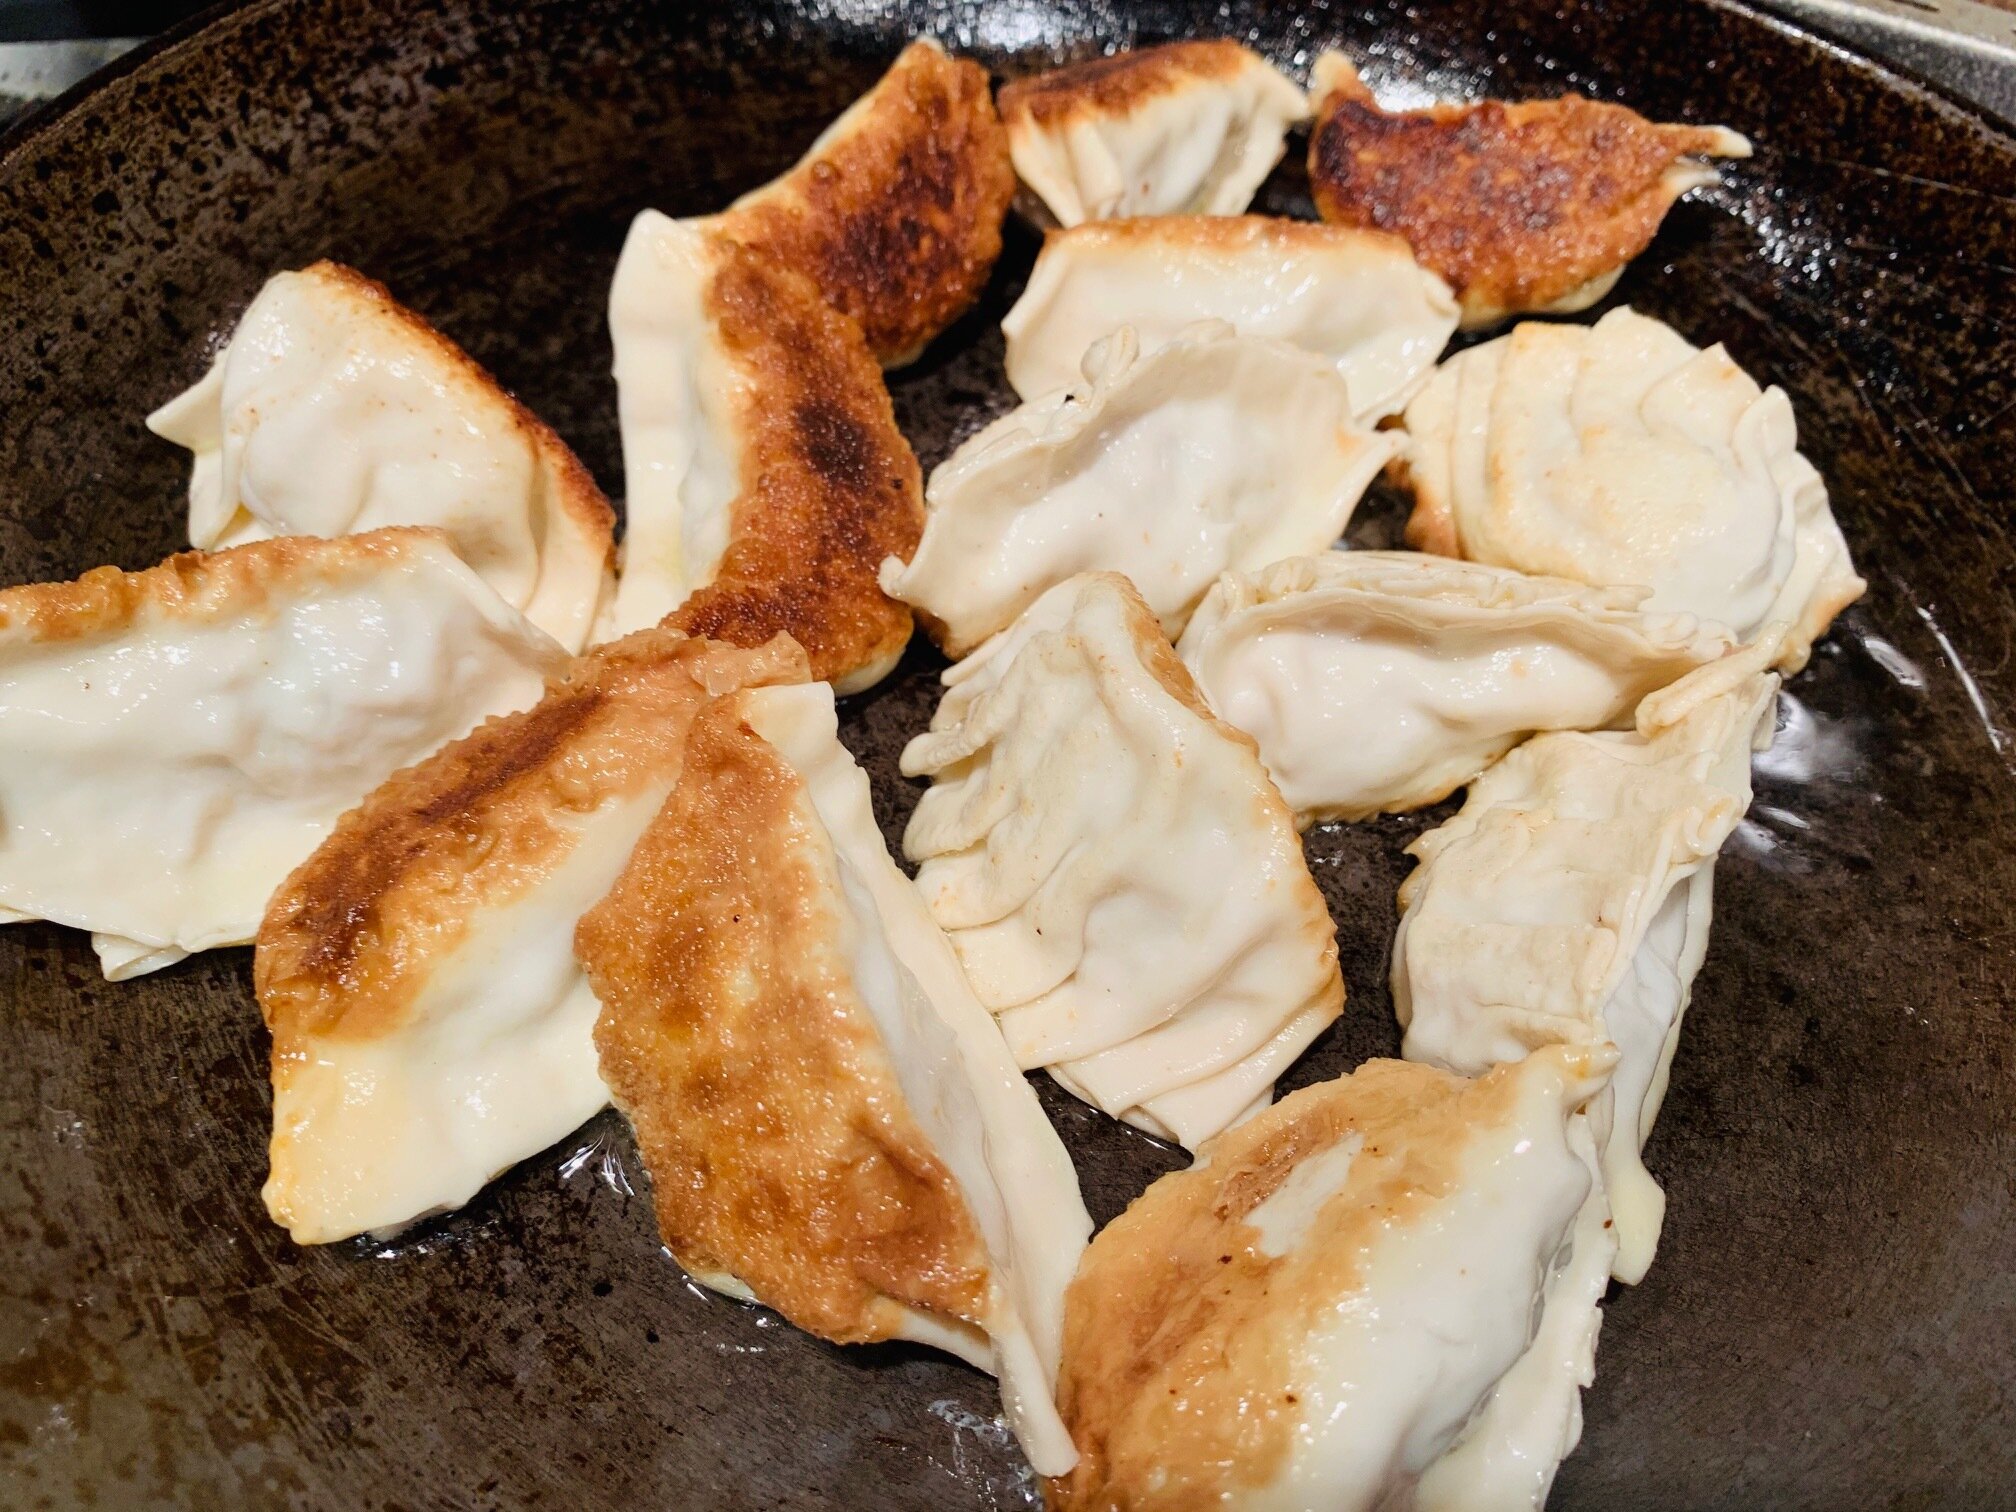
To cook, heat a pan on the stovetop.  Warm a tablespoon of sesame oil and pan fry the gyoza on the base only.  When golden brown, add two tablespoons of water and quickly place a sealed lid over the pan so the water is trapped and it steams the rest of the dumplings.

After a couple of minutes, check to ensure they are internally cooked.

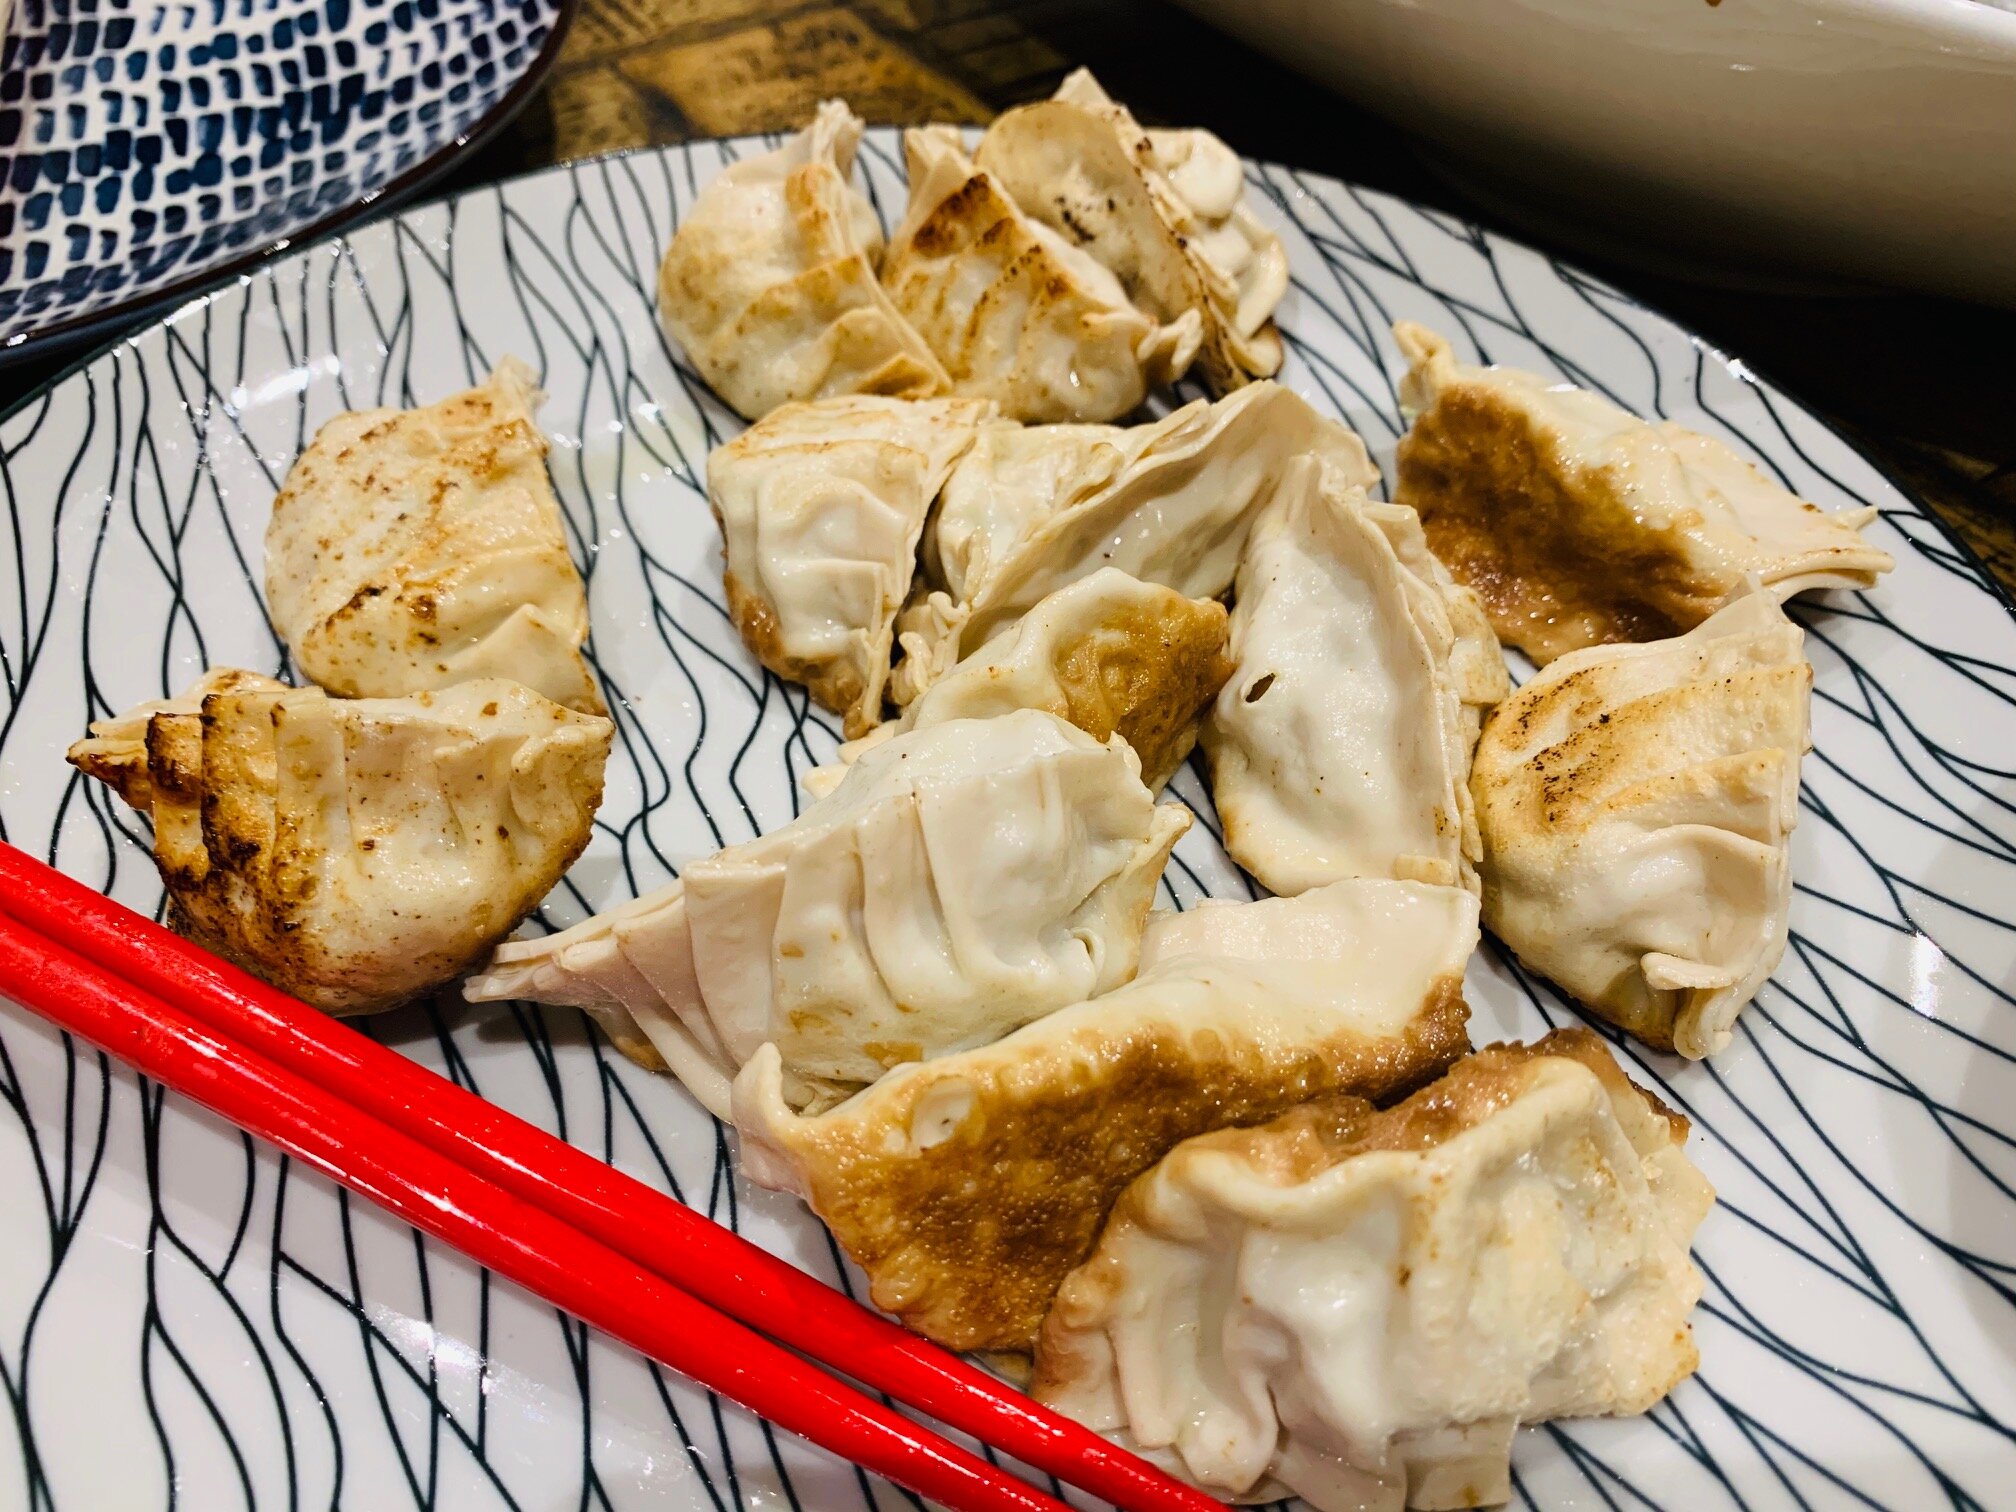
Make sure to use the fantastic dipping sauce.

Enjoy!

Saganaki (Greek or Cypriot frying cheese)

For those of you who have never tried Saganaki or Haloumi, your time starts now!  For the rest of you I’m preaching to the converted, so you already know what is below…

This cheese is awesome.  It takes three minutes from fridge to feast. 

It is not a strong cheese, it is just delicious.  It is so good the manufacturers have to limit each pack to two pieces only, which is the right quantity!

It can be served as an appetiser in Greek restaurants, but if the Greek restaurant is not open, bring the restaurant to you!  Saganaki and Haloumi are available at all Maxi stores.

How to cook:

-       warm stovetop frypan on medium heat.  Don’t add oil just yet,

-       open refrigerated pack, there are two pieces which require delicate separation,

-       soak for a minute in bowl of warm water,

-       remove from water and dust in both sides with flour,

-       add a tablespoon of olive oil to your frypan,

-       when the oil has heated, add the cheese slices, pan fry for about a minute on each side until they are a delicious golden colour.

-       eat them whilst they’re hot!

So Good!

Be game and try Saganaki. 

Vegetable Soup – so easy, so good! 

This soup has no oil, no fats, no meat and there will be none left!  So, make a large amount.

I find soups easily become broths when too much water is added.  It’s still a good soup, but it can be a little thin.  So, put loads of veggies into this soup and limit your water quantity so the flavour is richer and the soup is more of a meal than a soup.   

A little crusty bread goes a long way.

Ing.

1 x onion, diced

1 x potato, diced

2 x stems of celery, chopped into soup sizes

2 carrots, diced

3 x sprigs spring onion

1 x handful of Continental parsley, chopped

5 cloves garlic

4-6 cups hot water

2 x teaspoons Massel powdered chicken stock

A sprinkle of cracked pepper

A good pinch of Murray River Pink salt

In a large stovetop pot on medium heat place all the veggies.  No oil, no butter.  Gently stir them around a dry pot for about five minutes.  The veggies will soften very quickly.

Now add two cups of (hot) water, powdered stock, salt and pepper.  Stir it about.  Now add another 2-4 cups boiling water, bring to the boil.  Once boiling, put the lid on, turn the heat down to the lowest possible setting and leave for one hour.

Remember, low and slow brings out the best flavours.

Serve with crusty bread.  Very awesome

Stay well, stay safe.

Kind regards,

Brendan

Pizza Romana MMXX

You can’t go to Italy, so bring Italy to you!

Italian pizza is not like Australian pizza, which the Italians call ‘Pizza Americana’.

A traditional pizza from Roma or Napoli has a base of chopped tomato and ‘placings’ of Mozzarella or Bocconcini cheese and other things like artichoke hearts etc.   

Tonight, I made Pizza Romana.  The basil (the undisputed King or Queen of herbs) is added after the pizza leaves the oven, not before.  I have taken a few photos to show the process and I took a photo of every pizza, including the vegan version, so you can make this at home.

Ing.

Base

550gm ‘Tipo 00’ white flour, 440gm for the base, the rest to sprinkle

310ml warm water

2 teaspoons dry yeast (I use Lowan dry yeast because it always works)

2 tablespoons olive oil

A sprinkle of Murray River Pink salt

Top

2 x 440ml cans of diced tomatoes

A tub of bocconcini or fresh balled Mozzarella cheese

Fresh basil leaves

Murray River Pink salt

A splash of olive oil

Method

In a bowl mix the 440gm flour, yeast, olive oil and a sprinkle of salt.  Add the 310ml warm water (not hot, not cold). I usually fill a jug with 250ml boiling water and top up to 310ml with 60mls cold water.  Stir it all up until it is well mixed.  Then tip it ono the bench and start to knead.  Knead, knead, knead until you don’t need to knead anymore!

Place your dough into the same bowl you used to mix the dough, pour on a little olive oil and seal the bowl with Glad Wrap and place somewhere warm for 20-30 mins whilst it rises.  May your dough rise!

Preheat the oven to 240c.

When the dough is done, place it onto the bench and punch it, then knead it again for a few minutes until you have an excellent, soft, elastic dough.  Roll it into a thick roll and slice it into however many even pieces you want to make that number of pieces.

Roll each piece into a ball and then press it into a pancake on a dusted bench.  Keep pressing it with your hands, flipping it occasionally until the desired pizza size is reached.  I made six pizzas from 440mg flour.  They were each about 250ml in diameter.

Sprinkle the base with flour, particularly at the edges to get the rustic look.  If it looks good, it is good.  Presentation is everything!

Pour on your diced tomato directly from the can, the puree is also wanted.  Now add your bocconcini or Mozzarella in clumps, sprinkle a little Murray River Pink salt and a drizzle of olive oil.  Place into the oven.  Bake for about 10 mins or until the edges reach the right colour.

When the pizza leaves the oven it will be extremely hot.   Add your basil, take a photo for Brendan and eat it!

You can do this.  Be a superstar in your kitchen!

Enjoy.

A simple winter warming chicken soup

Simple chicken and veg soup (broth)


I know you can all make this, so this will serve as a reminder of how delicious it is and simple to make.  You’ll need:


2 fresh chicken carcasses

2 carrots

1 potato

3 sticks of celery

I onion

3 sprigs of spring onion

3 cloves of garlic

A bunch of fresh Continental parsley

Massel powdered Chicken Stock

Murray River Pink Salt

Cracked or freshly ground pepper


Put the kettle on as we require lots of hot water for this soup. 


Chop all the vegetables into little pieces.  A good knife is essential.  Perhaps I’ll do a review on the knife I use...  A good chef’s knife will make this chopping easy.  Of course the onion, the garlic and the parsley should be finely chopped.  We are not going to fry anything in oil.   


Place all your vegetables into a large pot on medium heat.  Stir them for about five minutes whilst they soften.  They will create their own moisture so there is no need to add water at this stage.  We are just softening the veggies.  When they start to stick to the pan, add about 100ml hot water.  Now add your chicken carcasses to the top.  


Add hot water to just cover the chicken carcasses.  This may be a litre or two, depending on the pot size you use, so be ready to refill and reheat the kettle.


Add a good pinch of Murray River Pink salt, cracked or freshly ground pepper, a teaspoon of Massel chicken stock.  Cover and bring to the boil and then reduce the heat to the lowest possible setting and leave for one hour.  


After an hour, remove the chicken carcasses, keeping any chicken meat you can extract.  Then toss the remainder of the carcasses away.  The soup will be ready, but fairly heavy in chicken fat!  There are several options now to remove the fat:


1.     Place the soup in the refrigerator overnight and remove the floating chicken fat with a spoon when it has settled the following day; or

2.     Let the soup cool a little, place ice into a metal ladle, place the ladle gently into the hot soup. The fat will stick to the bottom of the ladle!  Brilliant:

https://www.youtube.com/watch?v=MYugpggPaTs

3.     Let the soup cool, place an ice cube into the soup.  The fat will stick to the ice cube.  Remove it before it melts!


Serve with warm crusty bread.

Italian Bruschetta (pronounced Brusketta)

I was taught to make authentic Italian Bruschetta by my friend Sergio Di Benedetto, in Agrigento, Sicily in 1993. He lives in a house adjacent the Temple of Concordia in the Valley of the Temples in Agrigento, central Sicilia. In his garden were Greek columns and statue ruins you might expect to see in a museum, but alas, they were items picked up on the valley floor!

This is the authentic way to make Bruschetta and it is so simple, variations need not be created!

Toast your bread. Good heavy sour dough is best.

Take a peeled clove of fresh garlic and rub it across the surface of the bread. The garlic will erode as if it were a piece of soap. Don't use too much garlic or the flavour will be quite strong, unless you're an avid garlic lover.

In a bowl dice ripe tomatoes, chop fresh basil and add fresh olive oil, marine salt and a light sprinkle of freshly ground pepper. Mix it all together.

Place the tomato and basil mix on your garlic infused bread and eat.

Excellent!